|
Michael McFadyen's Scuba Diving - Japanese Submarine I-1
Just over 40 kilometres to the west of Honiara in the Solomon Islands is the village of Tambea. Also located here was the Tambea "Resort". Although this resort was operating in August 1992 and 1997 it is now a wreck due to the political problems in Guadalcanal. See comments at end of page.
If you travel up here, the first dive of the day is normally the Japanese submarine I-1. Note that this is not the I-123 as is sometimes reported. See comment below.
The I-1 was a Junsen (cruiser submarine) Type 1 (J1 Class) submarine launched on 15 October 1924 as No. 74 but completed 10 March 1926 as I-1. One of four constructed by Kawasaki at Kobe (all were lost in the war), the I-1 was a very large submarine displacing a maximum 2135 tons at the surface. She was 319 feet long and powered by twin shaft M.A.N. 10 cylinder 4 stroke diesels giving 6000 bhp and two electric motors of 2600 ehp. The I-1 had six torpedo tubes and carried 20 "Type 95" oxygen-driven torpedos.
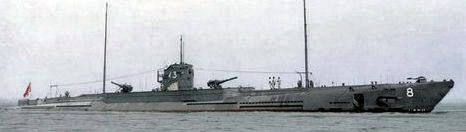 |
| The I-1 before the war |
On 28 July 1937 I-1 was part of the Submarine Division 7, SubRon 1, First Fleet, with I-2 and I-3. Over 21 to 23 August 1937 the I-1,, incomanpy with I-2, I-3, I-4, I-5 and I-6, operated in the East China Sea. They provided distant cover for BatDiv 1 ships IJNs Nagato, Mutsu, BatDiv3 ships IJNs Haruna, Kirishima and Isuzu ferrying troops from Tadotsu, Shikoku, to the Shanghai area of China.
On 10 November 1941 I-1 was made part of Operation "Z". She was placed in Vice Admiral Shimizu Mitsumi's Sixth Fleet with Rear Admiral (later Vice Admiral) Yamazaki Shigeaki's (former CO of old CA YAKUMO) SubRon 2. She is in Captain (later Rear Admiral) Shimamoto Hisagoro's SubDiv 7 with I-2 and I-3 based in the Yokosuka Naval District.
During the Japanese attack on Pearl Harbor on 7 December 1941, the I-1 was a member of the 2nd Submarine Squadron that took part in the attack. There were at least 28 large submarines and 5 midget submarines in Hawaiian waters at this time. On 30 December 1941 the I-1 shelled Hilo, Hawaii.
On 22 January 1942 the I1 arrived at Kwajalein Atoll with I-2 and I-3. They left Kwajalein on 24 January 1942 for Yokosuka. I assume that she arrived ther on 1 February 1942 as it is reported that the I-2 arrived there on that day.
The I-1 (together with I-2, I-3, I-4, and I-6 and flagship I-7) left Staring Bay in Sulawesi on 22 and 23 February 1942. It appears they headed for the Indian Ocean and the Western Australian coast.
On 3 March 1942 the I-1 was under the command of Commander Eitarau Ankyu a few hundred miles north west of Shark Bay, Western Australia when smoke from the funnels of the Dutch steamer, Siantar was sighted. The Siantar was 8,806 tons. The I-1 submerged and fired torpedoes at Siantar, missing her target. The I-1 then resurfaced and began firing its deck gun. The Siantar was an armed cargo vessel and she returned fire, however it was ineffective. The I-1 managed to hit Siantar with 30 to 40 direct hits. She caught fire. The I-1 then fired another torpedo and the Siantar sank.
After this encounter, I-1, I-2 and I-3 formed the 7th Division of the 2nd Submarine Squadron. They then were said to have headed to Australian waters (presumably by this it is meant the East Coast of Australia.
On 10 June 1942 the I-1, I-2 and I-3 were reassigned to the Northern Unit. On 11 June 1942 they departed Yokosuka for the Aleutian Islands together with I-4 and I-7. On 20 June 1942 the I-1, I-2 and I-3 joined the K patrol line, patrolling along 178W longitude, 48 to 50N latitude. They did this until 3 July 1942.
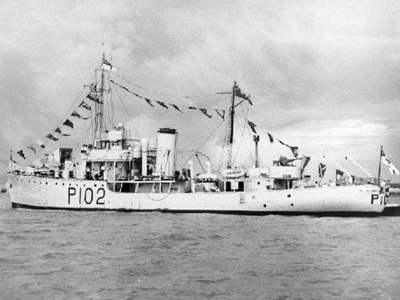 |  |
| HMNZS Kiwi | HMNZS Kiwi in drydock
after the submarine sinking |
At 1200 on 8 September 1942 I-1, I-2, I-3, I-4 and I-5 departed Yokosuka for Truk (Chuuk) Lagoon. On 15 September 1942 they arrived at Truk. On 17 September 1942 at least I-1, I-2 and I-3 departed Truk for the Shortland Islands, Solomon Islands. On 24 September 1942 the I-1 (together with I-2 and I-3) were reassigned to the Outer South Seas Force (Eighth Fleet).
Sometime during 1942, I-1 (and I-2) were modified to a transport submarine role. The 5.5 inch guns were removed and there was a reduction of torpedo carrying capability. In its place they could carry a 46 foot Daihatsu landing craft or an Amphibious tank or other forms of stores.
On 12 December 1942, the Royal New Zealand Navy ships HMNZS Moa (under command of Lt Commander Peter Phipps), Kiwi (under command of Lt Commander C. G. Bridson, RNZNVR), Tui and Matai left Espiritu Santo in the New Hebrides (now Vanuatu), arriving at Tulaghi in the Solomon Islands on 15 December 1942. Four days later the four ships started work, patrolling the Guadalcanal area.
On the night of 29 January 1943 the I-1 was under the command of Lieutenant Commander Eiichi Sakamoto off the Kamimbo Bay area (near Tambea).
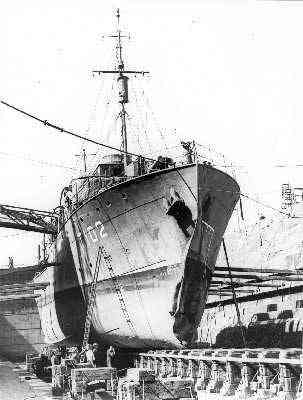
 | 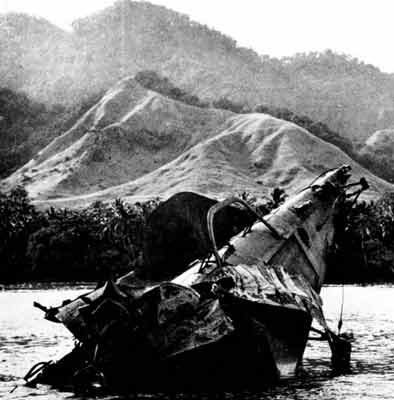 |
| Another shot of the bow of HMNZS Kiwi in drydock | The bow of the I-1 |
It was being used in the Solomon Islands for transporting troops and stores. The submarine was detected by the New Zealand corvettes (they were operating as minesweepers) HMNZS Kiwi and HMNZS Moa. These two ships were sister vessels, built by Henry Robb in the early 1940s. They were 51.2 metres long and 9.1 metres wide, displacing 825 tons. See HMNZS Moa page for more details on the ships. They were crewed by 35 men and had one 4" gun as well as 2 Hotchkiss light machineguns and one twin Lewis gun. The Lewis gun was replaced in 1942 by a 20 mm gun and in 1943 another 20 mm gun was fitted unofficially.
As the New Zealanders approached, the phosphorescent outline of the submarine could be clearly seen so the Kiwi dropped six depth-charges. Shortly after, it dropped another six and the submarine was forced to the surface with its electric motors apparently disabled. Switching on its diesels, the I-1 made a run for it and a surface battle ensured, with all three vessels exchanging gunfire. During the short battle, the submarine altered course to starboard just before the Kiwi rammed it on the port side abaft of the conning tower. Numerous hits were landed at this time.
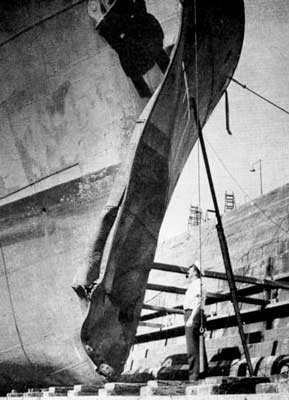
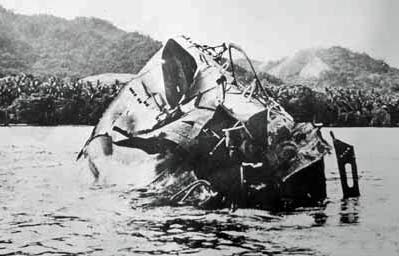 |  |
I think this is the conning tower of I-1
Taken 11 February 1943 | The bow of the I-1
Taken 11 February 1943 |
The Kiwi again rammed the submarine and an officer, probably the Japanese Captain, was seen to be hit by machine-gun fire. A third ramming damaged both vessels and the Moa took up the chase, following the submarine while continually firing its gun. More than two hours after the first attack, the I-1 hit a reef that was to become its final resting place. The next morning revealed the I-1 projecting about 40 to 50 feet out of the water at an angle of 45 degrees. The HMNZS Moa was later sunk at Tulagi Island in the Florida Group.
COMMENT:In some (many) reports, I have read that the sinking of the I-1 was also claimed by USS Gamble. However, the truth is that the Gamble sank the submarine I-123, also off Guadalcanal. It would appear that somehow the submarines have been mixed up and what was meant in the Gamble's reports was that it sank the I-123. The Gamble, by the way, laid the minefields that sank the SS President Coolidge and USS Tucker at Santo in Vanuatu.
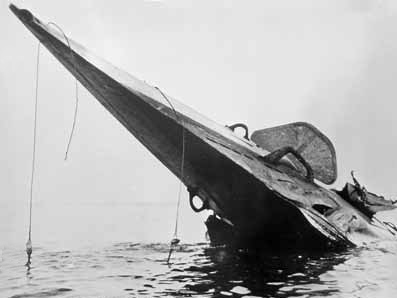
 |  |
| Looking over the bow section of I-1 | The middle section I-1 from the port side |
On 11 February 1943, the I-2 arrived at Shortland. She departed the same day with the torpedo officer for the I-1, Lt Koreeda Sadayoshi aboard. Her mission was to destroy the wreck of the I-1. After sundown on 13 February 1943, the I-2 penetrated Kamimbo Bay and closed to within 1,100 yards from the coast. However, they failed to locate the wreck in the dark. On the night of 15 February 1943, the I-2 returned to Kamimbo Bay and closed to within 1.4 miles from the coast. This time she was depth charged by torpedo boats and after 1120, chased away by an aircraft. She then returned to Shortland, arriving there on 18 February 1943. She departed the same day for Truk Lagoon.
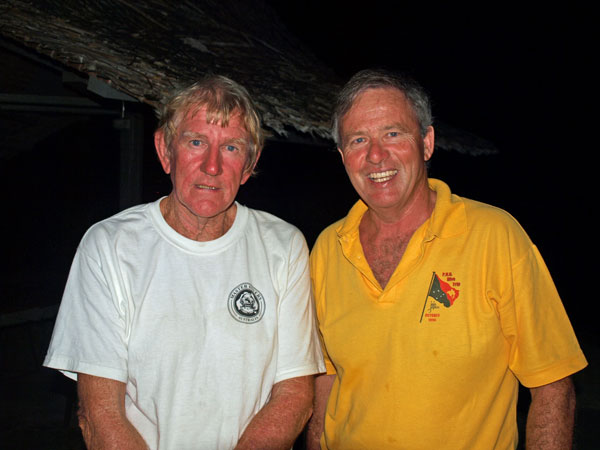 |
| Brian Bailey and me in 2009 |
During the period 1965 to 68 Graham Christensen was based in Honiara on secondment from the Commonwealth Bank of Australia working with the local bank on the Australian conversion to decimal currency. While he was there he snorkelled the I-1 a number of times. He even dived it using a hookah setup. Originally the bow of the submarine was out of the water. He also said he went down to the conning tower on hookah.
In October or November 1968 (according to Brian Bailey), Australians Wally Gibbins and Cyril Ashton found a depth charge at Hells Point east of Honiara. They put this on a truck and took it through the centre of town all the way up to the location of the submarine. They used this to blow up the bow section of the submarine in search of valuable metals. What they did not know was that there was one (or maybe even two) live torpedo still inside.
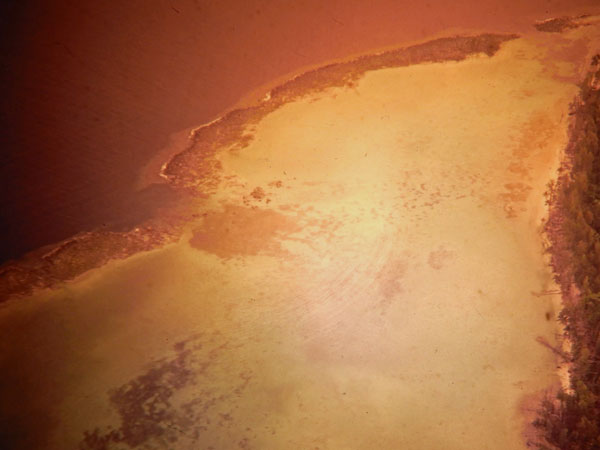 | 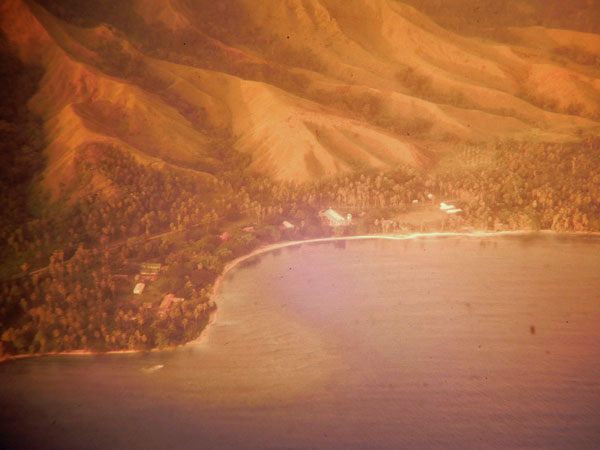 |
| Tambea reef, the I-1 is located in the damaged section of reef | Tambea village
Photos by Graham Christensen |
The explosion was apparently huge. A table sized piece of metal was thrown into the nearby village. This was then made into a table by them. After the work, the bow sections of the sub looked as as if attacked by a huge can opener.
Graham said that the explosion damaged a huge section of the reef. He also provided the above photographs he took from a plane, you can see the damaged reef clearly.
In 1993 Reg Thomas and Brian Bailey salvaged some half inch copper cables off the wreck.
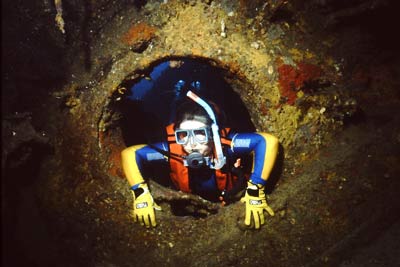 | 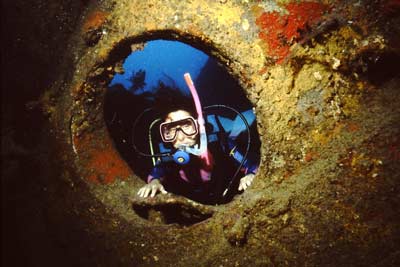 |
| Joan Harper entering the rear section through the bulhead hatch | Irene Forides entering through the same hatch |
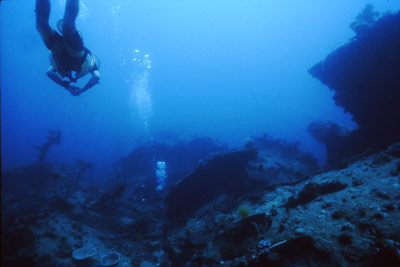
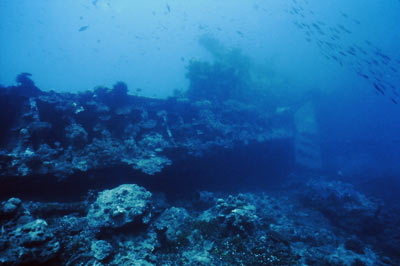
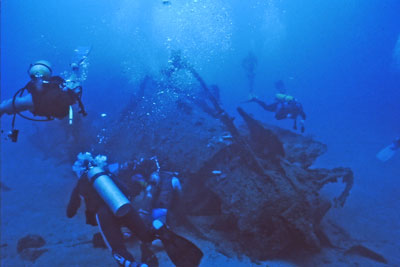
When I dived it in 1992, the front one-third was basically destroyed with the remaining section still virtually intact. The I-1 now lies with the bow in five metres and the stern in 30 metres of water.
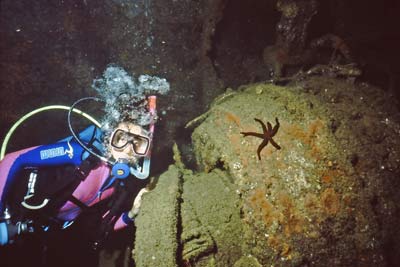
After gearing up behind the beach at the Resort, it was a short boat ride to the reef where the submarine finally came to grief. The boat anchored on the reef top and as soon as you descended you could see the bow. It was a simple matter to follow the wreckage to the main part of the wreck. The shallow part was opened up like an onion, totally destroyed. At about the 18 metre level we entered the submarine (see the photos below) and penetrated right through to near the stern. This was very safe and easy. The main section lies with a slight list to port.
 |  |
| Irene Forides and one of the electric motors | Irene swims along the port side near where the batteries are located |
At the stern we could see the submarine's dive planes, rudder, propeller shaft and prop. You could also see the net cutters, used to break through submarine nets that were used to guard ports. The return dive could be done on the outside. On the sand adjacent to the vessel's port side near the 15 metre level was a huge battery compartment with hundreds of wet-cell batteries in and around it. Other interesting objects to be seen included air-bank cylinders (used for discharging ballast tanks) and the huge electric motors that powered the vessel underwater.
 |  |
| The stern of the submarine - note the prop, dive planes, net cutter and rudder | Irene Forides hanging off the stern net cutter |
This was an excellent dive and like most of the wrecks around Honiara, the coral and fishlife in the shallower sections was very good. This dive was in very clear water (25 metres visibility) and very enjoyable. If you go to Honiara on a diving trip, do not miss diving the I-1 as I think that it was the best single dive I did while in Guadalcanal.
I understand that there some of the dive operations on Guadalcanal will visit this but they are not too keen. Also, you have to walk about 400 metres (some say over 1000 metres) to enter the water. I did it as a boat dive.
NOTE: Underwater photographs scanned 2011 from slides taken with Nikonos IV-A in 1992.
3D Model of I-1 Submarine - used courtesy of Brett Eldridge
This shows that the wreck has changed in the 32 years since I dived it.
References:
|  v6.00.307 © 2003-2005

