"SS Myola was discovered by Peter Fields and John Riley"
USS Aaron Ward - DD483
Michael McFadyen's Scuba Diving - USS Aaron WardBACKGROUND
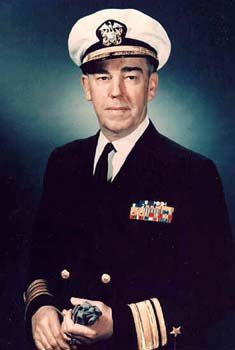
Admiral Aaron Ward
The Battle of Guadalcanal started on 7 August 1942 when the US Marines,
supported by the US Navy, Royal Australian Navy and the Royal New Zealand Navy
as well as the US Air Force stormed ashore at the beaches east of the now
capital of the Solomon Islands, Honiara, as well as on the islands near Tulagi. The battle was one of the fiercest of the whole of World War II, with huge loss of life on both sides. This was not going to be a short battle, it was assured of being long-term due to the nature of the land and the fact that the Japanese had been in "ownership" of the land for quite some time.
Just over 24 hours into the battle saw the first of the warship losses of the
campaign. The US warships USS Vincennes, Astoria and Quincy and the Australian heavy cruiser HMAS Canberra were lost in one 20 minute battle with a Japanese fleet that sailed in, attacked, and quickly left. The US Navy still says that this is "the worst defeat in a fair battle" (note
that the Japanese made what was possibly their worst mistake of the war in not
coming back and continuing the attack). After this the fleet needed reinforcing
and over the coming months, dozens of additional ships were committed to the
battle by the Allies. One of these ships was to be the USS Aaron Ward.
HISTORY OF THE SHIP
In September 1940 an order was placed for a new destroyer. On 11 February 1941
the keel of this warship was laid down at the Federal Shipbuilding and Drydock
Company yard at Keany, New Jersey. The vessel was USS Aaron Ward, a
Bristol Class destroyer (which was based on the Benson/Gleaves Class). The new
ship was the second named after the late Rear Admiral Aaron Ward who in July
1898 during the Spanish American War was the skipper of USS Wasp. He was
commended for gallantry when his vessel and another snuck into an enemy port and
sunk a cruiser. He later served as a Naval Attache in Berlin, St Petersburg and
Paris and even after retirement in 1914 he continued to work, travelling to
Europe for the Red Cross to assist with their war work. He died on 5 July 1918
and was buried in the Green-Wood Cemetary, Brooklyn, Kings County, New York
state. Nine months later, the first USS Aaron Ward was christened. As
indicated above, this new ship was the second Aaron Ward.
On 22 November 1941, just over nine months after the keel laying, the new
ship was launched by Admiral Ward's daughter, Miss Hilda Ward. The USS Aaron
Ward was 348 feet 4 inches long, 36 feet 1 inch wide and displaced 1,839
tons (2,395 tons full load). Over the next four months the ship was fitted out
and on 4 March 1942, the USS Aaron Ward was commissioned as DD483.
Powered by 2 shaft geared Westinghouse geared turbines (total 50,000 shp) with
steam from four oil fired Babcock and Wilcox boilers, the ship was capable of 35
knots and could cruise at 12 knots for 6,500 nautical miles, with a load of 453
tons of oil. The ship carried 250 crew.
The original armament for the new ships was to be four 5 inch guns, four twin
Bofors 20mm anti-aircraft guns and 10 21 inch torpedoes. However, there appears
to have been many changes to these armaments over the period of the construction
of the Bristol/Benson/Gleaves Class of ships as well as after they were built.
The final composition, at least for the Aaron Ward, appears to be four 5
inch guns, two by two 40 mm guns, and seven 20 mm guns and five torpedo tubes.
However, the Aaron Ward's armaments do not appear to meet the
specifications in any papers I have read on these ships.
The first Commander of the USS Aaron Ward was Commander Orville F.
Gregor. Her first runs were out of Casco Bay, Maine with the battleship USS North
Carolina and some minor work was then done at the New York Navy Yard. During one of these runs, the Aaron Ward they had gunnery practice. During one, the compressed air system failed in the number one five inch gun mount. A seaman named LeBlanc was the Shell Loader and he was ordered to actuate the compressed air valve manually after each round was fired. At some point, LeBlanc reached across for the air valve before the gun fired. The breech snapped closed, crushing his hand. He was taken ashore, where his hand was amputated at the wrist. He was "happy as a clam" that his injury meant discharge from the Navy.
One report says that the first job of the new ship was to escort a number of
ships to the coast of England together with the USS North Carolina
(BB-55), however I now do not belive this to be true. This is because the North
Carolina did not embark on her first cruise till 5 June 1942. However, it is
highly possible that from 9 May to 20 May 1942 the Aaron Ward trained
with the North Carolina out of Casco Bay, Maine, as both ships were in
this location.
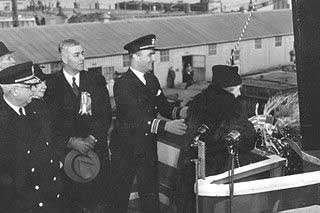
Miss Hilda Ward smashes a bottle
of champagne across the bow
of the USS Aaron Ward
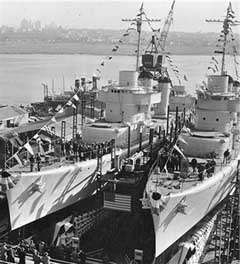
The USS Aaron Ward with her
sister ship USS Buchanan
Durward B. Allaman reports (see references) that on 20 May 1942 the Aaron
Ward sailed via the Panama Canal and San Diego for the Pacific. She was
escorting the SS United States and RMS Queen Elizabeth. The Queen Elizabeth was one of the largest and fastest passenger liners in existence. However, as far as I can see, there was no SS United States at this time so I am unsure of the real name of the ship (I thought it may have been USS Westpoint, formerly the liner SS America but the dates of travel do not match). Anyway, these ships were said to be carrying a total of 40,000 troops, although this may be a high figure as the Queen Elizabeth could only carry 15,000 and it carried more than any other ship. The troops transferred to smaller ships for the rest of the journey, probably to Australia and/or New Zealand. There was also a report that the Ward and North Carolina sailed together as part of a task force to Panama Canal but I now believe that they went in
separate task forces. The North Carolina left Norfolk, Virginia, on 28
May 1942 for San Diego, California
Mr Allaman also reports that from San Diego the Aaron Ward travelled to Alaska to intercept Japanese landings. He says that Commander Gregor had a Japanese cruiser in his sights but was refused permission to fire. I think that this is unlikely. They were next ordered to stand off Wake Island. This is a long way from Alaska! They returned to San Diego.
After this, the ship's role was as part of Admiral William S. Pye's Task
Force One (TF1) which included seven battleships and the aircraft escort vessel
USS Long Island. When the Long Island was sent back to San Diego
on 17 June 1942, the Aaron Ward was her escort.
After some work along the West Coast, the ship was sent on 30 June 1942 to
Hawaii and from there she sailed to Tonga with TF18. Her next real role was to
escort the oiler USS Cimarron to Noumea, New Caledonia. On 5 and 6 August
1942, the Aaron Ward thought that she encountered submarines and depth
charges were used. Two probable "kills" were claimed but this was not
true. The ship's next job was to escort and screen ships during the Guadalcanal
battle. In August 1942 she was part of Air Support Group Force, Group 3, at
Guadalcanal.
During 23 to 25 August 1942 the Aaron Ward was part of Task Force 18
of Task Force 61 when the Second Battle of the Solomon Sea occurred. At around this time, an incident occurred where the Aaron Ward was damaged.
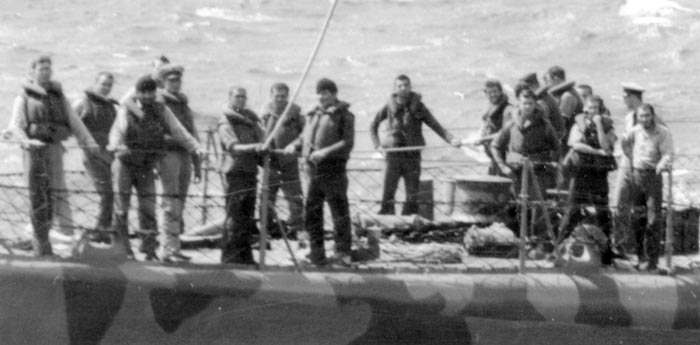
John J. Coleman had been a member of the Aaron Ward's crew since she was commissioned. In February 2009 he was 91 years old. His son, Tim, sent me some of his memories of his time on the ship.
The USS Aaron Ward's First Deck Division John J Coleman is third from right with hand on chin Photo courtesy John and Tim Coleman
One of Coleman's assignments was to act as "Talker" during transfers at sea. It was as "Talker" that he was present when the Aaron Ward collided with the USS Wasp (CV 7) during an approach for refueling. The Aaron Ward's bridge rail and forward funnel were damaged and a hole put in the ship's side. Coleman has a clear memory of standing on deck and looking up at the "Brass" on the Wasp surveying damage to a gun tub below the flight deck. He said that "we saved the Old Man's bacon by making all the repairs at sea." How ironic was this? Aaron Ward was the skipper of the USS Wasp in the Spanish American War and here the ship named after him hit his ship's namesake.
On 15 September 1942 she was with the carrier USS Wasp when the Wasp was torpedoed by the Japanese submarine I-19 (note that I have read that this was on 12 November 1942 but I know this is not correct, see next paragraphs). Note that this person also claimed that the Aaron Ward sank the Japanese submarine and it then came up under the ship's hull. Another irony here with the Aaron Ward present when the Wasp was sunk.
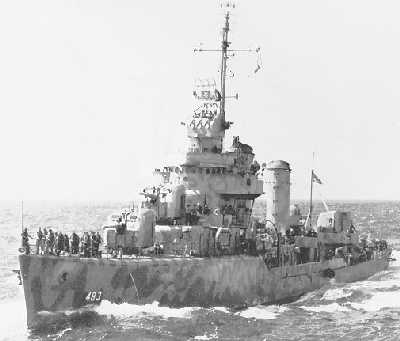
The USS Aaron Ward
During the night of 11 and 12 October 1942, the USS Farenholt was
badly damaged during action off Guadalcanal. It had many holes in the hull and
by shifting fuel and stores to one side, it lifted most of the holes above the
waterline and remained afloat. Accompanied by the USS Aaron Ward, the Farenholt travelled to Luganville on the island of Espiritu Santo in what is now Vanuatu (then the New Hebrides). They arrived there on 13 October 1942. On this day the Aaron Ward was seen by the USS Salt Lake City off Espiritu Santo. The Salt Lake City was on her way to Luganville in Segond Channel. It would appear that the Aaron Ward was on her way back to the Solomons as there is no mention of the other ship.
Around this time the USS Aaron Ward and USS Lardner (DD 487) were assigned to bombard Japanese positions at Tassafaronga, Guadalcanal. Both ships fired more than 2000 5 inch shells at the enemy, which averaged out to about 250 rounds per mount. John Coleman said that he loaded all 250 rounds (there was no backup Loader), but it wasn't too bad because the rate of fire was only about six rounds per minute, with breaks when the ships reversed course to continue the bombardment. When the action was over, Coleman said they emerged from the mount, blackened by the powder fumes and burning grease from the powder cartridges. They had to watch their step because of all the empty brass casings rolling around on the deck.
On 17 October 1942 the Aaron Ward was off Lungga Roads (this is the
general area around Honiara, especially to the west). While waiting for a marine
liaison officer to board to direct shelling operations, the ship was approached
by five Japanese planes. At about 0724 they attacked the ship. The ship's
anti-aircraft guns as well as those from the shore immediately opened fire and
the ship set off at full speed, manoeuvring as she went. Three bombs fell close
by, 100 to 300 yards (metres) off. Three of the planes were shot down, two by
the shore guns and the third claimed by both ship and shore.
At 0800, the ship embarked three persons (including the marine liaison
officer) and moved to a target area 40 minutes away. After shelling a gun
emplacement and ammunition dumps, the ship returned to Lungga Roads at 1216 and disembarked the people and rejoined her task force.
On 20 October 1942, the USS Chester was attacked and hit by the
submarine I-176. The USS Aaron Ward attacked the I-176 with depth charges but was not successful in damaging the Japanese ship. The Aaron Ward then
escorted the Chester to Espiritu Santo and was probably there on 26
October 1942 when the SS President Coolidge sank. On 30 October 1942 she was back at Guadalcanal and carried out more shore bombardment off Lungga Point (near the international airport and near where the USS John Penn would later sink), firing 711 rounds of 5 inch ammunition.
In mid-November 1942 the USS Aaron Ward was part of Task Group 67.4, part of Task Force 67. This was during the Third Battle of the Solomon Sea when her skipper, (now) Commander Gregor, had Captain Robert G. Tobin, ComDesRon 12, aboard and the Aaron Ward was the Flagship of the Task Group.
On 11 and 12 November 1942, she screened transports unloading material and
men and claimed one plane and two hits on the 11th and two more on the 12th. In
the evening of the 12th, the Aaron Ward headed east with five cruisers
and seven destroyers. Just after midnight on 13 November 1942, radar picked up
Rear Admiral Hiroaki Abe's Volunteer Attack Force consisting of two battleships,
one light cruiser and 14 destroyers. This was the start of the First Naval
Battle of Guadalcanal.
While attacking the Japanese, two torpedoes passed under the Aaron Ward
at 0155, hitting USS Barton and sinking her. At 0204 the ship had to go
hard-a-port to avoid a collision with the USS Sterett. Shortly after she
starting firing at a Japanese ship (possibly the destroyer IJN Akatsiki).
After 25 salvoes, the Japanese ship exploded and sank. Soon after, the Aaron
Ward was hit by a shell which put the director control (which is above the
bridge and controlled the ship's main guns) out of action and within minutes,
another eight shells hit the ship. By 0225 steering was lost and at 0235 power
lost from the forward engine room, flooded by water. By 0500 emergency repairs
had the ship (slowly) underway but only 30 minutes later power was lost again.
At 0618 the ship was underway again and at 0620 the attack transport USS Bobolink arrived to take her in tow. However, the battleship IJN Hiei opened fire and three shells landed near the Aaron Ward. One report says she was hit by the third salvo. The Hiei was then attacked by planes from Henderson Airfield (now the site of the international airport) and the Aaron Ward was taken in tow by the Bobolink at 0635, having lost power again. The Aaron Ward had been hit a total of nine times or perhaps ten times. Hits included the rangefinder, gun director, radar antennae, searchlights, radar room and hull.
John Coleman says his only memory of the battle itself, is being scared to death and the noise and smoke. He kept his head "scrunched" down, as if that would protect him. He remembers how quiet it was, when the firing stopped. After the battle, he "counted 13 ships on fire", with men, oil and debris in the water.
Coleman's account is that early the next morning, the damaged Japanese battleship Hiei spotted the Aaron Ward, which had been badly damaged during the battle (he says nine hits - three from 14 inch shells and two from "friendly" fire) and had lost all power. She was finally underway at five knots, when the Hiei opened fire with four two gun salvos from 13 miles away. The deck crew scrambled for cover behind the Aaron Ward's gun mounts and superstructure as the huge shell splashes came closer. Afterwards, Coleman said he felt foolish, because any one of those 14 inch shells would have plowed right through the destroyer's thin metal skin. John Coleman died on 11 October 2012 aged 95.
The US suffered very heavy losses in this battle, the USS Barton (90%
killed), Laffey (56 killed), Atlanta (172 killed), Juneau
(all but 10 survived, with the loss of the five Sullivan brothers), Cushing
(71 killed) and Monsson (110 killed - Monssen?) were sunk. In
addition, USS Aaron Ward (15 killed), Sterrett (71 killed) (26
killed), O'Bannon (0 killed), San Francisco (115 killed) and the Portland (16 killed) were seriously damaged. The Japanese had lost IJN Akatsuki (all hands killed - about 200) and the IJN Hiei (about 450 killed), Yudachi (unknown number killed) and some other destroyers had minor damage. This was a huge defeat for the USA.
At 0650 a local patrol boat took over the tow and at 0800 or 0830 the Aaron
Ward anchored in Tulaghi Harbour near Makambo Island. There were 15 dead
sailors and 57 wounded (one report says 12 dead, 3 dying and 57 wounded and
another 15 dead and 39 wounded). It is reported that the ship was taken to the
New Hebrides (now Vanuatu), probably to Espiritu Santo since there was a large
floating dock stationed there.
It appears the Aaron Ward headed to Noumea in New Caeldonia as on 3 December 1942 USS Hilo set out from Noumea towing two PT boats and with another two under their own power. They were headed to Cairns in Queensland, Australia. They travelled at five knots and were escorted by USS Aaron Ward. Click here to read about the ships, one of which was later sunk at Tufi In Papua New Guinea.
In any case, temporary repairs were made to the
ship (maybe at Cairns) and the Aaron Ward sailed for Pearl Harbor, Hawaii, escorted by an old four stack WWI destroyer, arriving 20 December 1942. Quickly repaired
(during which there may have been some modifications to armaments), the Aaron Ward rejoined the fleet in the Solomon Islands on 6 February 1943, at first undertaking escort duties.
"The Aaron Ward gave another fine example of the fighting spirit of the
men of our destroyer force. Though hit nine times by both major and medium
caliber shells which caused extensive damage she nevertheless avoided total
destruction by the apparently superhuman efforts of all hands. The superb
performance of the engineers' force in effecting temporary repairs so that the
ship could move away from under the guns of the enemy battle ship largely
contributed to saving the ship."
Admiral "Bull" Halsey on the action of 12-13 November 1942
On 4 March 1943 the Aaron Ward was anchored in Segond Channel,
Espiritu Santo, New Hebrides (now Vanuatu). At 0935, the Aaron Ward
together with USS Radford, Waller, Mahan (interestingly
this was the lead ship in a class of vessel that would include USS Tucker which was sunk at the southern end of Segond Channel on 4 August 1942), Fletcher, Nicholas and Conway left Segond Channel.
On 19 March 1943, the USS Aaron Ward was again in Segond Channel. She
was still there the next morning. Later that day, (20 March 1943), it would
appear the the Aaron Ward was escorting a convoy back to the Guadalcanal
area when one of the ships was attacked by Japanese planes and the Aaron Ward
fought off the planes.
Rear Admiral F. J. Becton
SINKING OF THE SHIP
On 7 April 1943 the USS Aaron Ward was now skippered by Lieutenant
Commander C. Frederick Julian Becton. Lt Commander Becton was later to become
the skipper of the USS Laffey (see above) and in 1956 the huge battleship
USS Iowa and later again, a Rear Admiral. She was escorting the transport
USS Ward and three tank landing craft from the Russell Islands to Savo
Island (about 40 km north west of Honiara). The ship sailed ahead to provide air
cover but at 1330 orders were received to leave the small convoy to cover the
tank landing craft LST-449 off Togoma Point (I cannot find this on my chart of
Guadalcanal but it must be to the east of Honiara). At 1419 the Aaron Ward's skipper ordered LST-449 to follow her and zigzag if Japanese planes were sighted. On board LST 449 was a young Lt. John F. Kennedy on his way to his first command, PT 109 (the attack on the Aaron Ward and LST 449 is chronicled in the first chapter of PT 109).
At about 1502 some 67 "Vals" and 110 "Zekes" or Zeros
(some reports only say 48 planes) were sighted over Savo Island. Of these, 18
went in the direction of Tulaghi and it is reported that 15 of these went for
the biggest target there, the USS Kanawha.
However, in view of the fact that at this same time the Kanawha and HMNZS
Moa were also attacked and sunk, it seems that more planes went in the
Tulaghi direction.
The Aaron Ward sighted planes over Savo Island and these planes
heading south over Tulaghi (in the Florida Islands north-north-east of Honiara).
At 1512 three "Vals" attacked out of the sun and the Aaron Ward
went to full speed and hard port. She opened fire and bombs from the planes
scored direct hits or near misses. The first bomb missed but the explosion tore
holes in the ship's side, flooding the forward engine boiler room. The second
bomb hit the after engine room, penetrating two feet into the hull, causing a loss of power to the 5 inch and 40 mm guns. The guns kept firing, using manual power. The third bomb also missed but holed the port hull near the aft engine room. Steering was lost and the ship went in circles to the left. Three more Vals attacked, with two bombs exploding within five yards. The hull plates were sprung.
After the attacks, 20 men were dead, 59 wounded and 7 missing. After the attack, the crew tried desperately to save their ship. John Coleman said that they couldn't get the pumps working, so they bailed with buckets until he thought his back would break. They were convinced that they would make it.
However, the Aaron Ward was doomed, taking water quickly. Anti-submarine vessel USS Ortolan and attack transport USS Vireo towed the Aaron Ward towards shallow water (a sand bank) off Tinete (or Tintete) Point on the Florida Islands. The Ortolan was on the starboard side and the Vireo on the port bow. After dark (at about 2130), the Aaron Ward started to go down by the stern and the order was given to "Abandon Ship". At 2135, the USS Aaron Ward was reported to have sank stern first about 600 metres off the sand bank. This was west of Mbungana (or Bungana) Island.
John Coleman reported that he was at the port bow, holding on to the lifeline to keep his balance. Next to him was a 19 year old sailor. When the ship lurched, they both jumped for the USS Vireo alongside. Coleman hit the tug's deck and skinned up his legs. The young sailor was found floating in the water.
After the sinking, the Aaron Ward's crew returned to the United States on a Dutch "Liberty Ship". In their wisdom, naval command did not provide an armed escort for the transport, and although the trip back was uneventful, the men were understandably worried after what they had just been through.
DISCOVERY OF THE WRECK
In October 1991, Dr Bob Ballard, discoverer of the wrecks of the RMS Titanicand the Nazi battleship Bismark, was in the Solomon Islands searching for Japanese, US and Australian warships lost in World War II. Ballard used side scanning sonar and he located the wreck of the USS Aaron Ward at that
time. He was using an Australian charter vessel called Restless M.. Two of the crew on the ship were someone called Evan and another person (let's call him P as his name is not known to me). Both these realised that the Aaron Ward was in diveable depths and thus knew the rough location of the wreck. By the way, Ballard came back in July and August 1992 while I was there and explored in detail the deeper wrecks like HMAS Canberra, USS Quincy, Astoria and Vincennes, all sunk on the night of 8-9 August 1942 as mentioned above.
After this, Evan went to work for Rick Belmare as a skipper of one of his charter boats. More about Evan and P later.
In May 1994, Ewan M. Stevenson, from Auckland, New Zealand, arrived in Honiara, the postwar capital of the Solomon Islands to undertake more research for a book he was planning on World War II shipwrecks. Ewan was convinced that the USS Aaron Ward was in diveable depths (that is, less than 240 feet [72 metres]). During this time, Ewan accompanied his friend, Brian Bailey, on some diving charters on his boat Wyuna. Some of these were scientific charters, where scientists searched for and collected things like algae and shells.
In late August and early September 1994, an opportunity came up while on one of these charters to search for the wreck of the USS Aaron Ward as they were going to be in the vicinity of the place it was believed to have sunk. On 3 September 1994, the Wyuna was anchored off Ghavutu Island. Ewan and the divers visited the wreck of HMNZAS Moa. The next morning, 4 September 1994, Ian Gardner came over from
Honiara in his 16 foot boat. He wanted to dive the wreck of the USS Kanawha, a US oil tanker sunk the same day as the Moa and the Aaron Ward. Brian was ill with a bad case of the flu and so was not feeling very well. In addition, the ship had had equipment problems, so Brian had spent most of the charter repairing things and so had not been able to do much diving. As can be imagined, a person with the flu and unable to dive in such perfect dive locations can also get a little cranky.
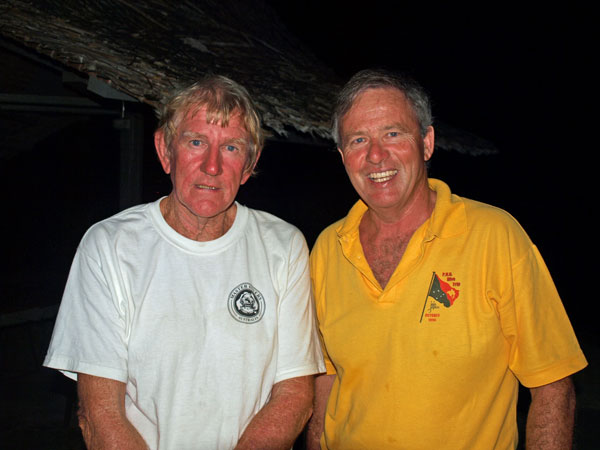
Brian Bailey and me in 2009
Brian had decided that that it was not worth diving the Kanawha from the yacht's dingy (because the seas were quite choppy) and too much trouble to take the yacht over to the wreck (probably due to his condition) so when Ian Gardner arrived, it was good news for Ewan. Ewan and the divers boarded Ian's
boat and motored the short distance to the Kanawha. They all had a great dive on the huge wreck.
After the dive, they returned to the Wyuna and had lunch. After lunch, Brian moved the yacht to the north-western side of Bungana Island where they intended to do a second dive. Brian was still not feeling well and was not really interested in searching for the Aaron Ward. The divers who chartered the Wyuna went for a dive and Ewan "lectured" Ian on the Aaron Ward and where he thought the wreck would be found. Ian was convinced, so they set off in Ian's boat towards where Ewan "knew" the wreck would be found.
Soon they were running around, with the depth sounder showing the bottom to be about 190 feet (51 metres). Ewan decided that the land at Tintete Point was too close and the depth too shallow. Moving away from the shore, they reached a depth of 210 to 220 feet (63 to 66 metres) but Ewan thought it was still too shallow. They moved further out to 230 to 240 feet (69 to 72 metres) and decided to follow this depth. The seas were rough, but the idea of finding the Aaron Ward made them forget this.
"What's that?" Ian suddenly exclaimed. The depth sounder showed a
sudden rise in depth from 200 to 160 feet. It was less than 20 minutes from the
time they had started searching for the wreck. They turned around and ran over
the object and this time it only rose a little off the bottom. Was this a coral
reef? It looked like one. Another run over the object this time was the same as
the first. This looked like a wreck, not a reef.
Ian and Ewan went back to the Wyuna and convinced Brian to come and
have a look at what they had found. Even though he was still ill, there must
have been something in what they said as Brian decided to accompany them. They
ran over the object and immediately Brian shouted "That's a wreck".
However, when they ran over it from the opposite direction he was not so
convinced. Eventually, they decided that it was probably a wreck.
Of course, the only way to be certain was to dive on the object. However, the
seas were not good and to make matters worse, Ian and Ewan had already dived to
over 50 metres that morning. They could not stay and dive it the next morning as
the divers on the Wyuna had to be back in Honiara that evening and Ewan
had to travel to the western and northern parts of the Solomon Islands for more
research. Before Ewan left for the western Solomons (after they had discovered
the "object"), he heard from Ian that Evan had mentioned something
about a US destroyer been found near Bungana Island. Ewan ran into Evan by
chance on the beach in front of the Point Cruz Yacht Club. He asked him about
the destroyer but Evan's answer led Ewan to believe that he knew more than he
let on.
Ewan ended up staying away from Honiara for longer than planned and he
returned in late October 1994. Brian had departed for Invecargil, New Zealand,
on 4 October 1994, to resume his abalone diving. On Sunday 30 October 1994, Ewan
and Ian headed across from Honiara to the Floridas to dive the object. However,
once anchored, the current was so fierce that they had to abandon this idea.
Ewan's visa had expired, so on 1 November 1994 he travelled back to New
Zealand. In January 1995, Brian phoned Ewan from Invecargil saying he would be
in Auckland in February and on 22 February 1995 he phoned and said he was in
Auckland. In this conversation, Brian informed Ewan that he and Ian had already
dived the object and yes, it was the wreck of the USS Aaron Ward. On 25
September 1994, a few weeks after Ewan had gone to the Western Solomons, Ian and Brian went over to the Floridas.
Brian and Ian descended through the dirty water (only 7 to 9 metres
visibility) and found the anchor just hooked into the bow. They made their way
towards the stern, taking the anchor with them. They dived the wreck again the
same day, with visibility now about 15 metres. The next weekend, Sunday 2
October 1994, they attempted to dive the Aaron Ward again. However, this
time they reached the bottom to find that they were anchored on coral reef with
a raging current. They abandoned this attempt to dive the wreck. Brian flew to
NZ two days later.
In early 1995 Evan started searching again for the wreck and on March 1995 he
apparently found it and did a bounce dive on it. He later dived the wreck with
Rick Belmare. They believed that they were the first to dive the USS Aaron
Ward.
The other person who worked for Bob Ballard on the Restless M., P,
arrived back in the Solomons in late 1994. He became the skipper of the new dive
charter boat, Solomon Sea owned by Fred Douglas. They also apparently
found the wreck in 1995, perhaps after being shown it by Evan. In any case, I
was originally told that Fred was one of the discoverers. It is likely that all
three groups thought that they were the ones who first dived the USS Aaron
Ward, but the truth is that Ian Gardner and Brian Bailey were the first to
dive her.
While it is possibly true to say that Dr Bob Ballard and his team discovered
the wreck, to date they do not appear to have claimed this honour. The
discoverers of the wreck are really Ewan Stevenson and Ian Gardner with great
assistance from Brian Bailey. Brian told me in September 2009 that he dived the wreck 80 times before anyone else dived the wreck.
THE WRECK
As indicated, the wreck was found south-west of Tinete Point which is the
western-most point of Nggela Pile. Today it sits on a sandy bottom of just over
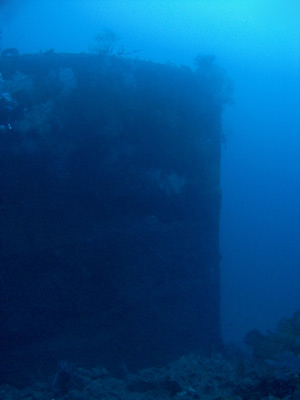
70 metres, with the bow facing east. The wreck has a slight list to starboard, meaning that the port side is a metre or two shallower than the starboard side. The ship is moored just behind the remains of the bridge on the starboard side. The GPS Reading is S9° 10' 6.3" E160° 11' 49.3" using WGS84 as a datum.
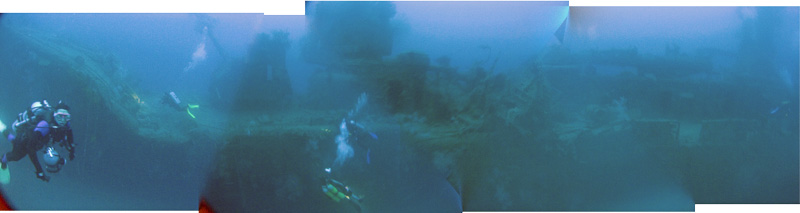
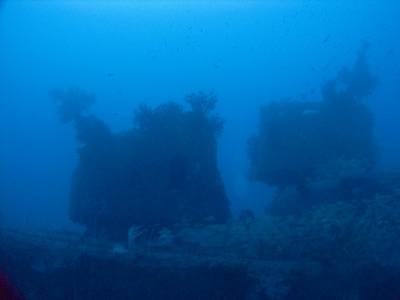
A panoramic photo of the port side of the wreck from the bow at left to the second funnel at right
As can be imagined, the depth of this wreck severely limits the available
bottom time and you need to carefully plan your dive so that you stay on track and time. Even then, you can still forget to do things (eg I forgot to take a photograph of the stern from the side!).
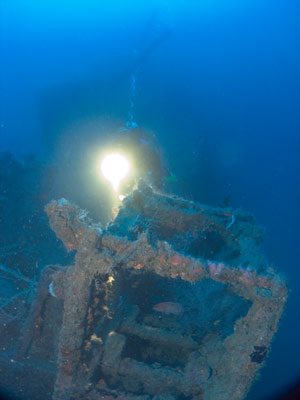
DIVE ONE - THE BOW
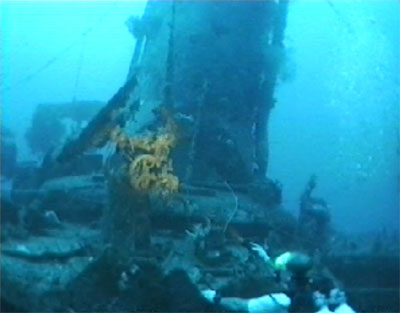
When I first dived here the bridge was basically fully intact. However, it has now totally collapsed and is basically a pile of junk. Head up the starboard side of the wreck towards the bow. There is a 20 mm AA gun on the starboard front side of the bridge but this has now inwards collapsed and there used to be one more at the starboard back side of the bridge (I think this is now covered by wreckage). In front of the bridge you will see the number 2 5 inch bow gun turret. The barrel is aimed high back at the port stern quarter.
Kelly and the very narrow bow of the wreck Note the coral growth on the hull
Another shot of the bow, this time from the side
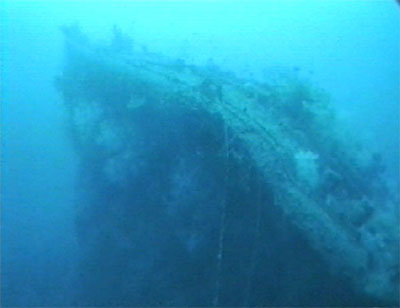
In front of this is the number 1 bow gun. Impressive. This is also aimed high,
this time at an enemy off the starboard bow quarter. The bow is bent up, although not as bad as the stern used to be (see Dive 2). It is almost 45º. It appears that
when the hull of the ship came down it hit some rocks that are under the bow and
this forced the hull to break. You can get a great perspective of the bow and guns from the reef on the right of the bow.
Kelly out off the port bow with other divers in the background
Looking from the bridge forward
Go right to the front of the wreck, out in front of the bow. You will see how narrow and sharp the ship is from here. Also note the twist in the bottom of the bow (see the photograph above). You will also see there are two anchors in place, one on either side of the bow. The depth is about 60 metres. It will have only taken about 8 minutes to get here at the most.
This very strange gun sticks out of the front of the bridge
Photo from hi-8 video
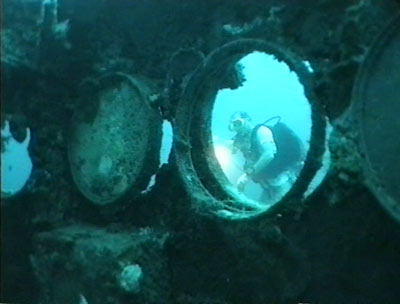
A porthole in the upper part of the bridge
Photo from hi-8 video
Come back to the bridge area along the port side. In the area of the crack across the deck there is a toaster. This came from the galley which appears to have been under this part of the deck. There is also some china visible from the deck. Pass by the front two gun turrets and then you will see another 20 mm AA gun, pointing high to the sky.
When the bridge was intact, there used to be yet another gun here, strangely sticking out of the front of the bridge itself (I could not find this in 2009 as it appears buried under wreckage). This is not mentioned in any book about the Aaron Ward's armaments, although there is mention of a 20 mm gun in front of the bridge. This was bigger than that and appeared to have little ability for movement apart from up and down.
The two bow guns from the port side - Number 1 on the left and Number 2 on the right
Kelly and the Number 1 bow gun
There used to be a 20 mm AA gun at the back port side of the bridge, partially collapsed from memory. However, in 2009 I did not see this and I assume that it is buried under the wreckage of the bridge or the automatic control system for the 5 inch guns.
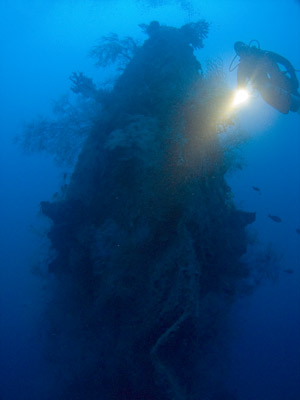
You used to be able to ascend to the top of the bridge and quickly look inside. It was obvious that there was some damage to the bridge during the battle as the floors had collapsed. You did not have much time to explore this area on your first dive. Behind the navigation bridge there was another structure that sat up even higher. This was a small cabin that had two round "pipes" that stuck out each side. This was the automatic control system for the 5 inch guns. This controlled the guns remotely, sighting the target and automatically turning and ranging the 5 inch guns. However, it is believed that it was the weight of this that caused the bridge to collapse. This structure is now lying on top of part of the wreckage of the bridge. It is tilted over to the port side. The depth here is about 56 metres and the time 15 minutes.
It is time to ascend. Decompression for this dive is about 2 minutes @ 12 metres, 4
minutes @ 9 metres, 9 minutes @ 6 metres and 21 minutes @ 3 metres. Together
with ascent and about 10 minutes of extra decompression, the total bottom
time was about 68 minutes.
Andreas Thimm and the 5 inch bow gun of the Aaron
Ward
Photo from hi-8 video
Kelly and a helmet
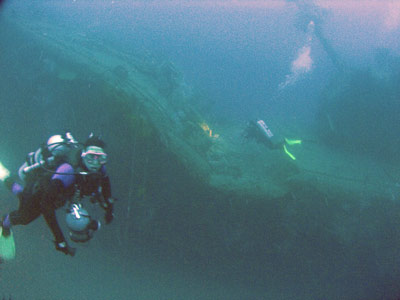
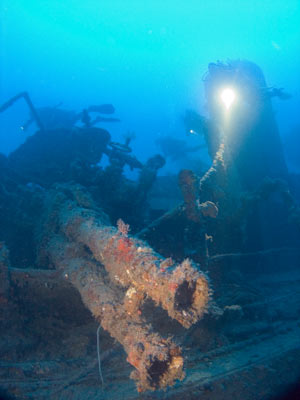
DIVE TWO - AMIDSHIPS
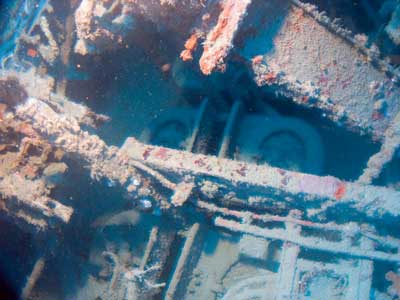
Once on the bottom you will have be down two or three minutes depending on your descent rate. The depth at the bottom of the mooring is about 61 metres. Adjacent to the mooring you will see that the forward funnel has totally collapsed. You can have a quick look at the torpedo launching system which is right behind the remains of the funnel. There are five tubes. Only one appears to have a torpedo in it, the one on the port side. You will see this is not true later when you pass by on the other side. Just have a quick look now, there will be time to examine it on the return trip. From the mooring you should head towards the stern on the starboard side as this is deeper.
The portside rear funnel AA gun of the Aaron Ward
Photo from hi-8 video
The toilets between the searchlight and the number 3 gun
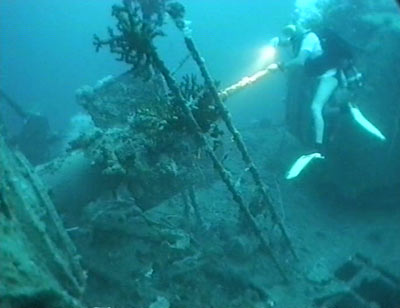
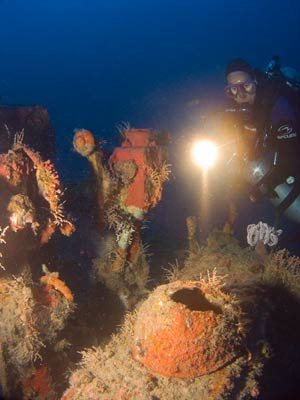
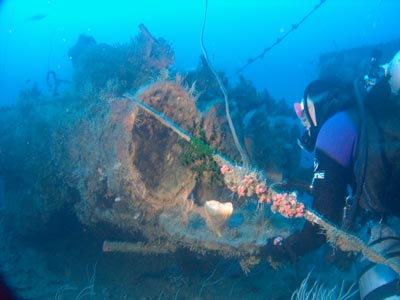
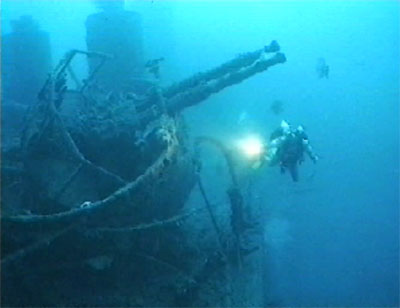
The first thing you will see past the torpedo tubes is the rear funnel which is intact. Adjacent to this is a small 20 mm anti-aircraft gun. Further on you will see a huge
searchlight and then a larger 40 mm twin barrelled Bofors gun. This gun has now partially collapsed outwards. Near here are what appears to have been the main cabin areas. Between the searchlight and the first of the stern guns is a raised compartment. If you look through the rusted roof area you will see two rows of five toilets. Very close together and letting sailors chat to each other as they "shat"!
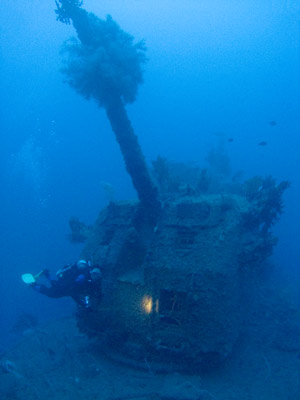
Behind here is the first of the 5 inch stern guns, the number 3 gun. This sits higher than the rear gun (for obvious reasons) and the barrel is aimed high to the starboard side. Right behind is the number 4 gun. This is also aimed high towards the starboard side. It will have taken you 8 or so minutes to get here and the depth is 63 metres.
It is time to turn around. Cross over to the other side of the ship and swim forward along Turn around here and head along the the slightly higher port hull. You can see the main guns from the other side and then the port twin 40 mm guns and the rear cabin area. There is a door and on a later dive you can enter this area and come out the other side. Next to the funnel is the 20 mm AA gun.
Kelly examines the port-most torpedo tube
The starboard Bofors gun Note Kelly in front of rear funnel
In front of the funnel are the torpedo launcher tubes. As you approach them you will see that while the closest tube is open, the four other tubes have their doors closed (in 2009 the port one was also open). From the front of the system you will see that the torpedo in the nearest tube has moved forward. You will also see that there are also other torpedos in the launcher. The middle three have their warheads in place and sit as they should. The starboard one is missing its warhead. This is lying under the launcher. The depth here is back up to 62 metres and the time will be about 13 minutes.
Spend the next few minutes looking around here and the bridge area. For a bottom time of about 15 minutes you will need to do approximately 1 minute at 12 metres, 3 at 9 metres, 7 at 6 metres and 24 at 3 metres. This gives a run time of about 68 to 70 minutes including an extra 10 minute safety stop.
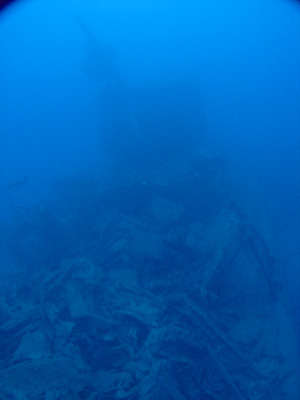
DIVE THREE - THE STERN
When I first dived this wreck as you descended you first saw the bridge. When doing this dive it is best to drop off the mooring line as soon as you see the wreck and head towards the stern. This was easy as you could easily see the bridge and gun control system and use that to orientate yourself. Now it is a bit harder. You need to look for the second funnel and then drop towards and past it.
Have a quick look at the guns as you pass by the starboard side. It is best to go along this side as it is deeper and gives quicker access to the props.
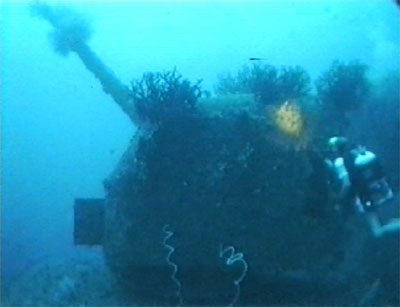
Andreas Thimm approaches the starboard
Bofors guns of the Aaron Ward Same guns as photo above right
Photo from hi-8 video
Andreas Thimm and the stern of the Aaron Ward
Note the 5 inch gun and the port prop and rudder The stern is now lying on the bottom - see text
Photo from hi-8 video
Until September 2006, you would have immediately noticed that the stern section was totally broken and sitting at almost a right angle to the main body of the ship. It was angled upwards. It seems that the Aaron Ward went down stern first and when the ship hit the bottom, the stern was broken right across. However, between 25 and 28 September 2006, the whole stern section fell down and is now sitting almost in line with the main section of the wreck.
Once you approach the stern area, head out off the side of the wreck for about 15 metres or so to take in the view. You do not need to drop right down, but this will give you a great perspective of the wreck. If you can, take a photo (unlike me who forgot to the last time I dived it).
From here swim over towards the wreck and drop towards the prop. Originally when you dropped over the side and you could see that the port prop shaft was bent and still attached to the stern section while the starboard prop was still lying where it should be in relation to the ship. Just parts of one blade of this prop were showing.
Kelly and the starboard stern depth charge rack Depth 65 metres
The bent up bow of the Aaron Ward Photo from hi-8 video
Now this prop is still the same but the port prop is roughly in place as it would have been when the ship was in service. The depth here is 71 metres and the time as you go back to the deck is about 7 minutes. You only need to spend less than a minute over 70 metres, even if you want to take a photograph.
Go back up over the stern and you can see the depth charge racks at the stern, one on either side of the ship. These appear to be empty. Where the broken section of stern joins the main deck there is now a break right across the deck. Here you can see some items, including a fully intact chair and the remains of another. There are also said to be some bunk beds, the springs standing out clearly.
From here you head back along the port side towards the bridge area. As you go, you pass by the various guns, funnels and the torpedo tubes covered on the Amidships dive. If you missed anything, you should have time to look at these again.
For a bottom time of about 15 minutes you will need to do approximately 2 minutes at 12 metres, 4 at 9 metres, 7 at 6 metres and 24 at 3 metres. This gives a run time of about 70 minutes including an extra 10 minute safety stop.
OTHER DIVES
On later dives here you can do a bit of exploring. Things to look at include
the torpedo tubes, dropped over the side to examine the hull sides to see if there was any obvious damage (there was not). You can also look at the cabins under the rear funnel and swim through from the port side to the starboard side. You used to be able to enter the
starboard door under the bridge. In here was the communication area, a galley and probably the officers' mess. There were plates, cups, bowls and chairs further forward (I did
not go in there). Of course, you cannot now access this area at all. In the bridge itself the steering binnacle was visible as was what appeared to be the compass binnacle. This was a mess, with wires and metal hanging everywhere.
You can go to the bow and look a bit closer at the guns.
SUMMARY
Visibility on the wreck was between 15 to 20 metres in 2001 and between 25 and 30 metres in 2009. Water temperature was
between 25º and 28ºC.
This is a great dive, probably one of the top two or three dives I have ever
done. After the first dive I did on the USS Aaron Ward, I was asked what I thought. My answer was "If
it is possible to have an orgasm underwater, then I just had one". It is
that good!
As you can imagine, the USS Aaron Ward is only for experienced deep
divers. It is a much more difficult dive than the SS President
Coolidge since it is a square profile and more time is spent at a
greater depth. However, it is much easier than made out by some technical
"gurus" and is not really any harder than the deep wrecks off Sydney. If you dive
them without problems, then you can do the Aaron Ward.
I used twin tanks for this dive and Kelly used an 88 cf with a 63 cf sling tank. We also did half of our decompression on 50% oxygen mix (sharing the tank). We did not cut our decompression times, but used this as a safety buffer.
In 2009 I dived with Dive Tulagi and is run by an ex-Sydney diver, Neil Yates. See my Tulaghi page for more information.
 v6.00.307 © 2003-2005