"North Head has numerous dive sites with excellent sponge life"
Toa Maru No 2
Michael McFadyen's Scuba Diving - Toa Maru No 2
Toa Maru
The Toa Maru No 2 was a passenger/cargo ship built at Nagaski, Japan, for the Osaka Shosen Kaisha (OSK Line). Launched on 8 December 1938, the ship was 133.8 metres long, just under 18 metres wide and displaced 6,732 tons. Powered by an eight cylinder diesel engine, the ship's first voyage was from Kobe to West Africa. In 1941 the ship was called into war service and used to transport men and equipment about the Pacific.
On 28 May 1942 the Toa Maru left Saipan in Micronesia in a large convoy which included the Kiyosumi Maru (now a wreck in Chuuk Lagoon), Goshu Maru and Nankai Maru. The convoy was escorted by IJN Jintsu. The freighters were carrying an airfield construction unit and its equipment, Lt Colonel Ikki Kiyona's Imperial Japanese Army (IJA) detachment and two battalions of Special Naval Landing (SNL) forces. This equipment was meant for the Battle of Midway, presumably to build new airfields on islands they intended to capture or had already captured.
On 3 June the convoy was attacked by nine USSAF Boeing B-17 bombers (I do not think that they sank anything) and it was then attacked by some US Consolidated PBY Catalinas (not sure if this was the same day). The Catalinas were carrying torpedoes and one hit the Akebono Maru. On 13 June 1942 the convoy arrived at Truk (now Chuuk Lagoon) where the airfield construction unit was off loaded. The convoy left on 15 June and the next day it arrived in Guam. Here the IJA detachment was unloaded. The convoy left again the same day and on 21 June arrived in Yososuka (Japan?). I have no idea where the SNL force was unloaded.
On 14 January 1943 the Toa Maru No 2 was on her way to or from the Solomon Islands (probably on her way back to Rabaul - see later) when she was attacked by the submarine USS Nautilus. One torpedo actually hit the Toa Maru but it was a dud and the ship lived for another day.
On 22 January 1943 the Toa Maru left Rabaul under escort by IJN Hiyodori and Subchaser No 23 bound for Kolombangara Island in the Western Province. As this should only take a day or two, it is likely that she went back to Rabaul for another load and left again on 29 or 30 January 1943.
On 31 January 1943 the Toa Maru was carrying equipment and supplies to Kolombangara again. Her destination was Vila Harbour (also called Disappointment Cove) on the south-eastern corner of the island where there was a Japanese supply base. The ship was spotted by coastwatchers (mostly Australian and British men stuck there when the war started) leaving Rabaul on New Ireland in Papua New Guinea a few days earlier. On 31 January 1943, 12 Douglas TBF Dauntless torpedo bombers from the Marine Scout/Torpedo Bomber Squadron VMSTB -142, as well as perhaps some Douglas SBD 5 Dauntless dive bombers (not sure how many), left Henderson Airfield on Guadalcanal to the south with the aim of attacking shipping in Vella Gulf. They were escorted by eight Grumman F4F-4 Wildcats from Marine Fighter Squadron VMF-112 (it was not necessarily mentioned in reports that the aim was to find and destroy the Toa Maru).
Two of the Wildcats had to return with mechanical problems while the rest of the planes continued forward. These planes were led by Lt James Secrest, with other planes under the command of Lt Jefferson DeBlanc, Lt Lynch, Let Maas, Lt Hughes and Staff Sergeant James Feliton.
The reports about the action differ a little but the following is what appears to have occurred.
The dive bombers made their first attacks on the Toa Maru without any apparent hits (see my comments later). Seeing this, Lt Secrest, made a strafing attack on the ship, despite the fact that they were supposed to be support aircraft protecting the bombers from Japanese fighters. He also had another problem, he had almost no ammunition as his armourers had failed to rearm his plane properly that morning. They had test fired his guns but apparently forgot to put back in the rounds that they used (or perhaps did not add any at all after a previous mission and test firing).
Secrest and his section attacked the Toa Maru and Lt DeBlanc and his section followed in support. As they passed over the ship, the Toa Maru burst into flames.
In fact, it would appear that the dive bombers had hit the Toa Maru. The wreck today has two bomb holes in the bow. The first is a large hole in the hull on the port side in Hold One and the second is a smaller hole between the Chain Locker and Hold One, also on the port side. It is also reported that the rear holds was hit, probably by the fighters. The Toa Maru sank sometime after on the northern side of Sepo Kokiti Island which is located about seven kilometres to the north of Gizo township.
After the attack, the SBD were departing when they were attacked by two Japanese float biplanes. Lt DeBlanc shot both these planes down. While this was happening, at least 10 Mitsubishi Zero fighters attacked the group. Lt DeBlanc shot down one of the Zeros and Lts Lynch and Maas got one each. During the dogfight, Lt DeBlanc's plane was hit and he is reported to have had problems with a fuel leak from a mechanical problem. He also ran out of ammunition. Lt Secrest attempted to help DeBlanc by flying at the Zeros even though he had no ammunition.
DeBlanc's plane was hit again and he was seen to bail out at 200 feet and his plane went into the water. A report says that DeBlanc's parachute was seen in trees on the north-western corner of Kolombangara Island but this was not true. Also shot down was Staff Sgt Feliton who was last seen attacking one of DeBlanc's attackers. The same report that said DeBlanc ended up on leand said Feliton ended up in the sea. This was incorrect. DeBlanc ended up in the water and Feliton's plane crash landed in the jungle on Kolombangara Island and he landed there as well after parachuting.
In the meantime, DeBlanc was in the water and would have to swim for six hours till he reached Kolombangara Island. He was hidden by natives before being taken to a missionary. Two weeks later he arrived back at Henderson Airfield. Feliton was also rescued and had returned to Henderson earlier, although it was reported to me that he returned on the same Catalina flying boat as DeBlanc. Feliton's plane was found at some time and in 1999, Dennis Letourneau of Alberta, Canada, and his father refound the plane in a remote swampy area of Kolombangara Island. The plane had crashed, exploded and burned.
In the late 1960s or early 1970s, the ship was subject to some salvage work by Australian divers. The team was led by Barry May and included Reg Thomas (later the operator of a dive shop in Honiara and now a resident of there) and, I think, Wally Gibbins. They removed the prop and cut a salvage hole in the hull to access the engine room. Some other objects have been removed from the holds or deck and placed on the topside of the port hull. More about this later.
Today the Toa Maru lies on her starboard side on a sandy bottom at a maximum depth of about 37 metres. The ship is not far off the beach on Sepo Kokiti Island and aimed right at it, indicating that the skipper had been attempting to beach her there. There is a mooring on the bridge.
The following is a description of the wreck from the bow to the stern.
A diagram of the Toa Maru Courtesy of Danny Kennedy, Adventure Sports Dive Shop, Gizo
The hull above the bow is about seven metres. The bow itself is a bit deeper. The two anchors are in place. Just behind the port anchor there is a hole from one of the bombs. It is right on the bulkhead between the Chain Locker and Hold One. It is definitely not a salvage hole as the hull is pushed in and there is no logical reason for there to be any salvage work in this area. You can use this hole to enter Hold One.
On the deck there is a gun platform and mount but the gun has fallen off when the ship turned on her side. I did not notice it on the sand. In front there is the chain locker which can be entered. There are lots of ropes and pipes in there. The forecastle does not appear to be able to be entered. On the main deck behind the forecastle there is a spare anchor on the port side, that is near the top.
Hold One is next. This hold has thousands of bags of cement, all rock hard after exposure to the water. As mentioned above, you can also enter/exit the hold via the bomb hole at the back left corner as you look into the hold or via the other bomb hole at the front bulkhead. For now we will continue aft.
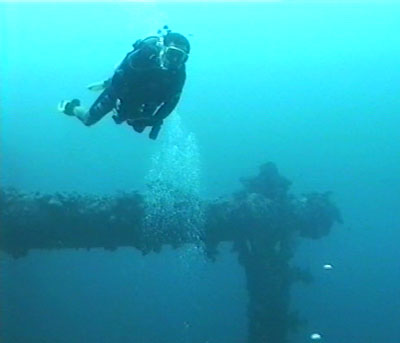
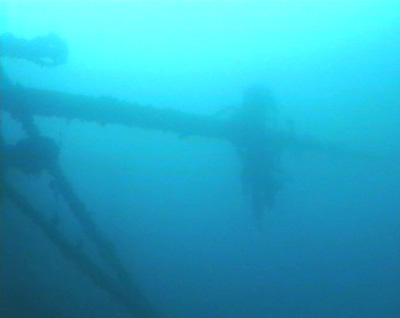
Heinz Bendinger and one of the kingposts of the Toa Maru Photo from Hi-8 video
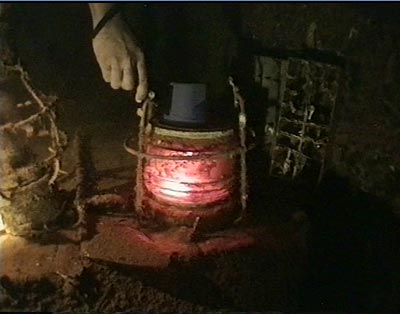
Two of the lanterns inside Hold Three Photo from Hi-8 video
Between Holds One and Two is a mast. This is still in place and extends right out over the sand. Behind the mast is the hold. The most obvious thing you will see here is a two man tank. This is sitting upside down on the side of the hold's entrance. The turret is easily seen as is the small gun barrel that extrudes from it. Behind the tank there is another track. Whether this was a spare or from another tank buried under debris I do not know. In the hold there are thousands of beer bottles, steel girders and some ammunition. What we noticed most were timber packs containing four mortar bombs. There are hundreds of these. You can exit from Hold Two into Hold Three via a rust hold at the top left of the hold or you can go back outside.
If you come outside you will notice some very interesting things between the holds and on the sand under the opening to Hold Three. There is a large kingpost (the H shaped part of a ship) and above the uppermost support there is an object that Danny Kennedy of Adventure Sports dive shop at Gizo says is a motorcycle. He said that it originally had a side car. Nowadays it does not resemble a bike at all (apart from the seat perhaps). There are other objects here that appear to me to be parts of a largish field gun. I say this after my three trips to Chuuk Lagoon where I saw a lot of this on wrecks. To me, the "bike" looks like the parts of a gun where the crew sit and adjust the gun. However, Danny assures me that in the mid-1980s when he moved to Gizo it definitely looked like a bike. Despite this, I am confident that the other bits here are a gun. Why? Because on the hull above here there are at least two (or maybe three) large barrels and trigger assemblies, a gun mount and other parts of field guns. It is likely that the salvage attempts moved these here to get at other items in the holds or perhaps they had some intentions to later salvage them.
Hold Three is mostly empty but just outside the hold there is a large truck. At the back of the upper level of this hold there are some lanterns. They look very nice when you put a torch inside them. In Holds Two and Three, Danny's dive guides have hidden away a lot of artefacts that they pull out to show you. Some of the things include large ampoules, bottles of pills and other items. There are also plates, cups, thermos flask and other items on display on the holds' edges.
Behind Hold Three is the bridge. The funnel is still in place, amazing after almost 60 years and considering that it is lying on its side. This is the only WWII shipwreck on its side that I have seen that still has its funnel in place. Behind the funnel are the engine room skylights which give access to the engine room. There are also the davits for the ship's lifeboats.
You can enter the bridge a number of ways. First, there are some windows at the front that enable you to enter the lower areas of the bridge. You can exit the bridge area at the rear of the bridge through some doorways or drop into the engine room or exit through the skylights.
Inside the bridge you can see the navigation level and the steering binnacle. The wheel is not there, probably as it was timber it rotted away. A level down is the communications area. There is a typewriter, telephone and radio equipment here. Further back there is the galley, with a stove, pots and other kitchen equipment. These can be access from the rear doorways. I seem to recall that in the bridge our guide also showed us a glass jar full of condoms!! Somewhere we also saw a pile of Japanese newspapers.
The engine room can be entered numerous ways. As indicated above, you can get in via the lower levels of the bridge or the skylights. When the salvage work was done on the ship, two large holes were cut in the hull at the bottom of the engine room. These provide access. If you are starting a dive by doing the engine room first, this is probably the best way to get inside. In this area you will see a huge amount of equipment. There is a telegraph here, as well as the lower parts of the diesel engine. In one spot you can see an exposed piston.
The stern mast of the Toa Maru Photo from Hi-8 video
The propshaft of the Toa Maru Photo from Hi-8 video
The upper levels of the engine clearly show the cylinder heads. As well, there is a small machining room, with grinding wheels, lathes and other maintenance equipment. There are also some spare glass for portholes here.
Behind the bridge is Hold Four. This is empty. Below the entrance to the hold there are at least two trucks lying on the sand, covered with seagrass or kelp. Behind here is the rear H shaped kingpost. You can swim from Hold Four into Hold Five as it is really one big hold. Hold Five has piles of timber logs and beams. They are everywhere.
Coming out of this hold you will see a jeep to the rear under the rear mast. Hold Six contains hundreds of 44 gallon drums. Just outside the entrance to this hold there is a small fuel tanker, lying on its left side with the engine towards the wreck. The tank cylinder has rusted a fair bit and most of it has gone. It is 37 metres deep here.
The stern of the ship has a raised sterncastle. You could enter this but it did not appear to have much to offer from my quick examination. The stern has another large gun platform and mount. The gun is not on the mount but is located on the sand below, falling off when the ship went over.
Dropping to the sand and moving off the ship a bit gives a great view of the wreck. The depth out here is 40 metres. Swimming under the stern you come to the rudder and propeller shaft. As indicated earlier, there is no prop as it was salvaged many years ago.
This is a large and relatively deep wreck so it takes quite a few dives to see it all. I would recommend at least three dives on it to be able to take it all in.
Video on YouTube - 3 mins 6 secs - 19Mb
A short video of part of the wreck. I shot this in 2001.
Summary:
This is a very good wreck, the equal of many of the Chuuk Lagoon shipwrecks. There are numerous items to see, including tanks, trucks, jeeps and other artefacts. In fact, it is a much better wreck than I had expected from what other people had told me about it. Visibility averaged 15 to 20 metres with water temperature about 28°C.
 v6.00.307 © 2003-2005