|
Michael McFadyen's Scuba Diving - Hirokawa
Maru
Two of the vessels lost in the Battle of Guadalcanal in the Solomon Islands were the Japanese troop and supply ships Hirokawa Maru and Kinugawa Maru. Located 13 kilometres west of Honiara near the Bonegi Creek, the wrecks are more commonly known as Bonegi I and II respectively. Both wrecks are only metres from the beach and are done as shore dives.
The Hirokawa Maru was built in 1940 by Kawasaki in Kobe for Kawasaki Kisen K.K. and was 6,872 tons. Its length was 508 feet 6 inches and it was 62 feet wide. One record I have read says that the ship was powered by two eight cylinder diesel engines driving twin props but this is not correct. This ship certainly only has a single prop so I doubt that it had two engines. The ship had a normal cruising speed of 16 knots with a maximum of 21 knots.
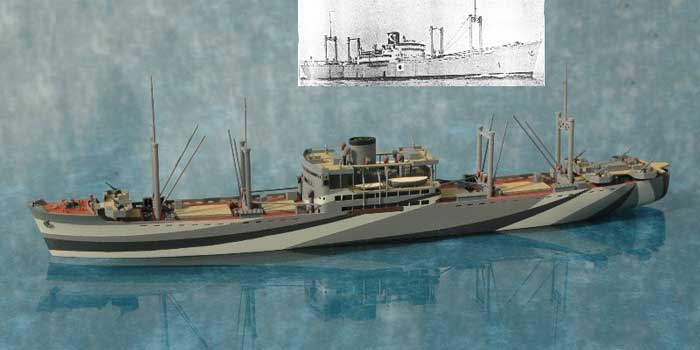 |
This is a photograph of a model of the Hirokawa Maru
Note that I have seen a number of similar models and all are not the same. In fact, some are certainly
not of the Hirokawa Maru as the mast/kingpost configuration is not the same as the wreck |
It is assumed that the ship may have been used for her original purpose, but it is also possible that she was only ever intended to be used to support the upcoming
Japanese expansion into the Pacific. In any case, the Hirokawa Maru ended up being used as a support vessel for the Guadalcanal theatre of the Pacific war. It is reported that the ship first arrived at Guadalcanal on 4 September 1942.
Some three months after the Americans (Marines, Navy, Air Force), Australians (Navy) and New Zealanders (Navy and Air Force) started their attack on Guadalcanal in an attempt to take back the Solomon Islands, the Hirokawa Maru was waiting near New Georgia in Papua New Guinea as part of a troop convoy. There were 11 transports and cargo ships and 12 escorting destroyers. The ships carried 10,000 troops, weapons and 10,000 tons of supplies. The convoy was sighted by a patrol plane at 0830 on 14 November 1942 about 150 miles from Guadalcanal.
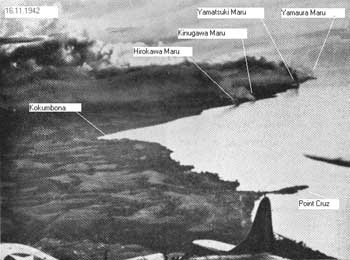 |  |
This aerial photo taken the day after the Hirokawa Maru
was wrecked clearly shows the wreck on fire
Photo taken by Bob Gibson, see Kinugawa Maru page for details | The Hirokawa Maru in 1944 |
Planes from Henderson Airfield on Guadalcanal and the USS Enterprise attacked the convoy, sinking seven of the tranports with another two damaged. The remaining four transports continued on towards Guadalcanal. At dawn on 15 November 1942, the four transports were found by the Americans to be on or near the beaches west of the now location of Honiara. At 0500 field guns from the 244th Coast Artillery Battalion opened fire from west of Lunga Point. Even though they were 20 kilometres away, they hit one ship which began to burn (this was most likely the Hirokawa Maru). The 3rd Defense Battalion's five inch batteries opened fire at 0545 and hit a second ship about 16 kilometres away. This ship also caught fire and listed to port. The destroyer USS Meade moved from Tulaghi and shelled the these two ships.
Planes from Henderson and the Enterprise attacked the two remaining ships. By noon, all four ships were on fire and sinking. Three were ashore and the fourth sank off shore.
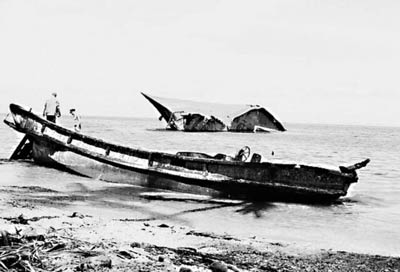
Originally the ship was stranded right up on the reef but over the years it has broken up under the effects of storms, rust and some salvage work (in the 1960s). Wally Gibbins was an Australian who went to the Solomon Islands in the 1960s to salvage the wrecks. He says that the prop was taken by a Chinese diver who also cut off the top of the wreck above the water for scrap. He says that the Chinese diver blew a hole in the side of the wreck with ammonia nitrate. However, Brian Bailey says that he (Bailey) salvaged the prop of the ship and also took two spare prop blades that he found in a hold near the stern. These weighed 2.25 tons each.
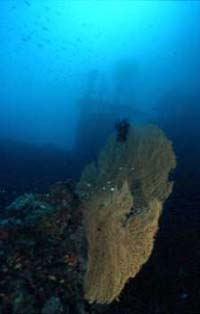 |  | 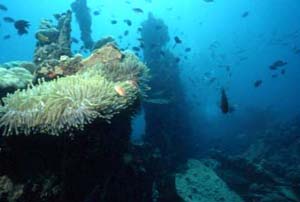 |
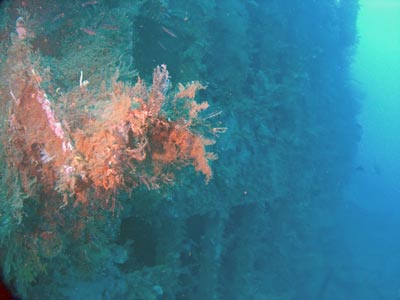
Gorgonia with the hull near the bridge area behind
Photo taken 1992 | I think this is the same general
shot as the one at left
Photo taken 2009 | Anemone and clownfish
on the wreck
Photo taken 1992 |
The wreck of the Hirokawa Maru is located on Bonegi Beach about 13 kilometres west of Honiara. It is about a 15 minute drive there from the major hotels. You need to enter through an entrance gate where a few for diving (or snoreklling or swimming) is collected by the landowners. You park behind the beach at GPS S9° 23' 9.1" E159° 52' 26.6" (using WGS84 as a datum). You can gear up on the sand/grass behind the beach.
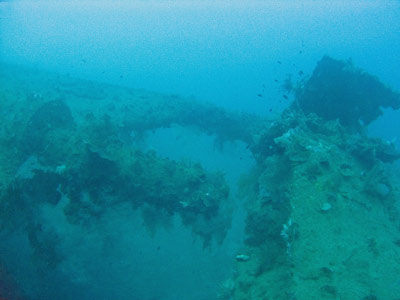
Nowadays, the wreck starts about 30 metres off the shore. The shallower sections of the ship are pretty well broken up while the deeper parts are almost complete. The bow section is virtually nonexistent, only scattered bits exist. This section is about five metres deep with the main attraction being the fantastic coral and fishlife. More about this later.
The middle and stern section of the Hirokawa Maru is lying on its port side and runs from 10 metres down to over 55 metres. It is far more intact and the propeller shaft and rudder make a very interesting dive.
Once you have geared up, walk the very short distance across the sand to the water. There is a small channel out through the coral that is the best spot to enter. Once out here, descend to the bottom onto the sand and head to the north. You will soon strike the wreck.
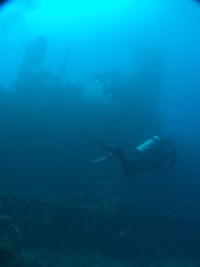
The best way to dive this is to head straight to the deepest point you wish to visit and then slowly return back up the vessel, finally ending up in the shallows. From the shallows, head along the right side of the wreck as you look at it (the wreck on your left). The bottom drops very quickly. On your left the wreck will mostly look like a small wall. This is actually (in most places) the deck of the ship. After six or seven minutes you will be at 50 metres if you are going to the stern.
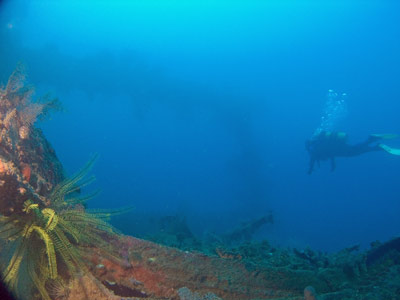 |  |
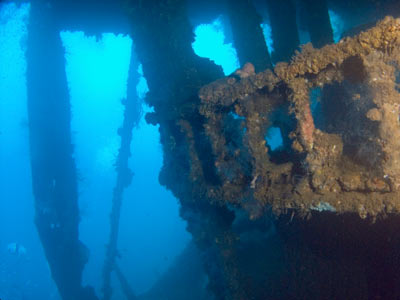
| Kelly approaches the number three kingpost | Kelly after passing through the number three kingpost |
On the way you will pass by the wreckage of the bridge (more about this later) and then the third of the ship's kingposts (counted from the bow). This is fully intact and in place, stretching out from the wreck to the sand. It makes an interesting photograph. However, for now, go to the stern and take a photo on the way back. You pass over the fourth kingpost which is more collapsed (from memory). This is just before the stern itself.
Once you reach the stern, head around to the northern side of the wreck about level with the middle of the stern. Here you will see the propeller shaft and rudder. You will notice that the area in front of the rudder is damaged, probably by the explosives used by Brian Bailey to remove the prop in 1968.
Head back to the stern deck area. You can see the steering gear though the rusted remains of the deck. You can enter the wreck here. I have been told that there is much to see in this area, including ammunition, but I have not had the chance to explore this area.
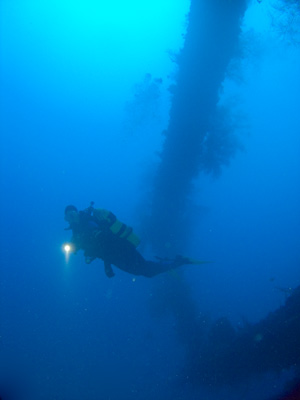
 |  |
| The prop shaft, notice the damage on the right | The stern deck of the ship |
There are three holds behind the bridge area. There is a small hold behind the collapsed rear kingpost. This appears to be mostly empty. This connects to a larger hold in front of this kingpost. There is a smaller hold forward of the next intact kingpost. You can also enter this from the previous hold. On the bottom of each of these holds (that is the vertical wall in front of you as you enter) you can see the drive shaft housing. The depth on the sand and in the lower sections of the holds is about 43 metres or so.
You can take some great photographs of the kingposts with divers and fishlife. I should mention that there are normally great numbers of largish fish on the deeper sections of the wreck. These include trevally and giant trevally.
Forward of here on the sand are the remains of the bridge. This is a mess. As far as I can see, you cannot get into it. I think the funnel was also out here somewhere. The depth is about 27 to 30 metres.
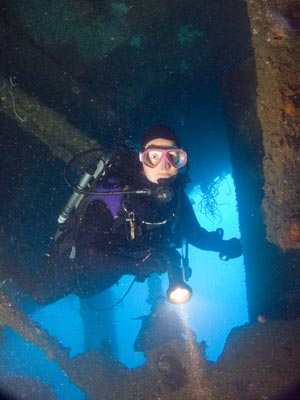 |  |
| Kelly in the rear hold of the Hirokawa Maru | Another shot from inside one of the holds |
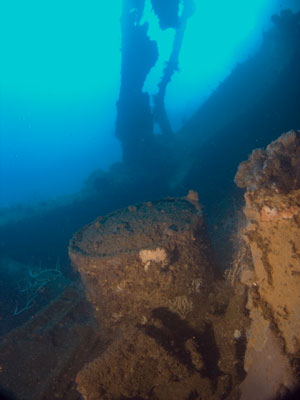
Near the bridge area the hull is badly split. The bottom of the hull is basically fully intact behind this area. As you look at the hull bottom, it is sheared vertically. The starboard side of the hull here is also mostly missing towards the rear. It gradually comes back. The top of the hull bottom here is about 12 metres or shallower and there is a lot of fixed marine life here worth examining. However, leave it for now and come back once you are shallower.
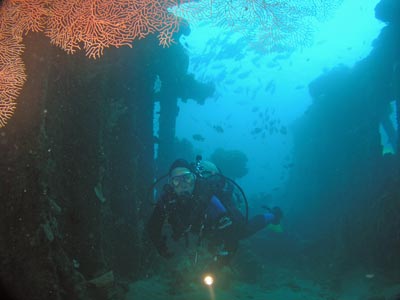
Forward of the bridge is very interesting, not from a ship's point of view, but from the marine life. The wreck here is composed of the various levels of the holds and decks. These are lying on their side, forming sort of aisles that run from deeper to the shallows. These little streets have huge amounts of fixed marine growth. The gorgonias and corals are amazing. There are also lots of small sponges and even anemones. The depths here are from 20 metres up to 10 or even shallower. Work you way forward along the sandy bottom. Also look outside the wreck and on the hull bottom side.
 |  |
| Another one of the rear holds | This is one of the upper levels of a forward hold
- the roof of this section is to the right |
Once you have reached 10 metres, you can head back towards the stern, this time higher up the wreck. As mentioned above, there are some great fixed marine life here, including magnificient gorgonias. There are often large schools of fish swirling around this part of the wreck.
From here head back across the top of the wreckage towards the bow area. This part of the wreck has some of the best reefs that I have seen anywhere in the World. You can spend a huge amount of time in this area. Look for anemones and clownfish, nudibranchs, crabs, shrimps, cuttlefish and more. You can easily spend a good 40 minutes or more in this area and not get bored.
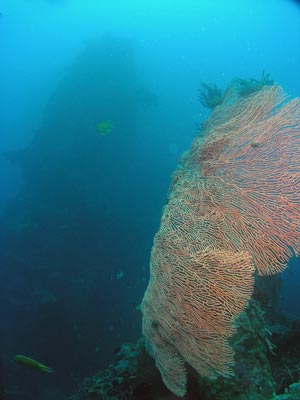 | 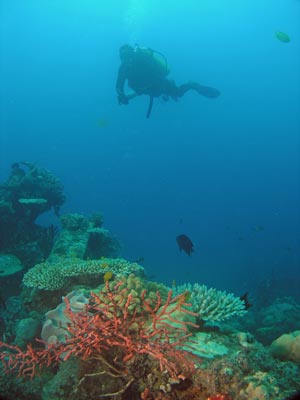 |
One of the numerous gorgonias on
the wreck, especially in the shallower parts | Believe it or not, there is wreck under this coral |
The wreck of the Hirokawa Maru is one of the most enjoyable dives I have done in the world. It is a very good wreck and a very good reef. I can thoroughly recommend it if you get to Honiara.
The water on these dives was pretty clean with about 18 metres visibility. In August and September the water temperature was 27 to 28 degrees and does not vary too much from this.
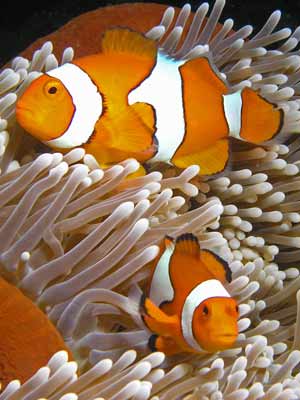 | 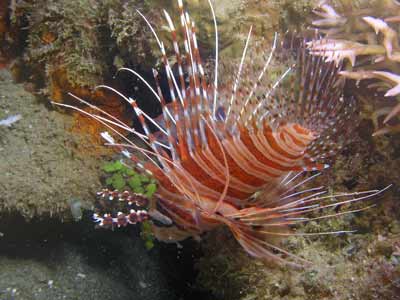 |
| A couple of clown anemonefish (Nemo) on an anemone | One of a number of firefish seen on the wreck |
Although these wrecks do not have the intactness or artefacts of the Chuuk Lagoon wrecks, they still make excellent dives and are a very good (and cheaper) alternative to those wrecks. Other advantages of Honiara diving includes the closeness to Australia, the (far) cheaper accommodation, food, drink and diving and the very good exchange rate between the Australian and Solomon Islands dollars. One big advantage for people with non-diving partners and children, both these wrecks (and some of the others) can be snorkelled. In addition, they are excellent dives for people who do not like wrecks as they are as good a reef and any you will see.
In summary, the diving in Honiara is very good and I can certainly recommend it.
Dives:
References:
|  v6.00.307 © 2003-2005

