|
Michael McFadyen's Scuba Diving - Jibbon Bombora South East/Fish Reef
Just outside Port Hacking, 25 kilometres south of Sydney, lies a rocky outcrop that comes up to almost the surface, Jibbon Bombora. In calm seas, the reef is virtually invisible, but in large seas the waves break over the entire length of the reef.
Not to be confused with the nearby Jibbon Reef (Head) or the nearby Pizza Reef (which a charter boat at one time called Fish Reef), the bommie is an excellent dive site that is not dived all that regularly by dive charter boats. This is probably because in very flat seas the skippers tend to rather travel the longer distance south to places like Marley, the Balcony, Tumbledowns and the other excellent sites. On the otherhand, if the seas are up, it can not only be difficult to dive Jibbon Bombora, but dangerous.
Although it is located just off the mouth of Port Hacking, the site is not affected too much by stormwater runoff except after an extended period of very heavy rain. Even so, the site recovers very quickly and can be relatively clear after only a couple of days.
The bombora itself is made up of two peaks, a larger northern one and a smaller southern peak. The depth over the peaks is only two metres at low tide. In between, the reef is about four metres deep and used to be home to a number of resident grey nurse sharks. Around the peaks the bombora gently slopes to 9 metres before dropping away more dramatically.
The western side of the bommie is not the best dive site as it does not drop down as rapidly or to as great a depth. The best dive here is found by lining up the southern peak of the bommie and slowly running in towards the shore. When the depth comes up to about 15 metres, drop your anchor. A GPS of 34° 04.880' S 151° 10.562' E (using WGS84 as datum) will put you in a good spot.
 |
| A map of Jibbon Bombora South East. The dive site I describe in detail below is a bit deeper. |
As mentioned, this dive site was one that I used to dive fairly often in the late 1980s and early 1990s when diving from Les Caterson's then charter boat Cat Dive and later his private boat Le Scat (which I later owned). However, since then I had only dived it once in 1996 till February 2026 when I dived here again. I still need to do some more dives here.
After descending to the seabed, start your dive by heading west. After a short distance you should see a small kelp covered ledge. The depth will be 12 to 13 metres on the ledge. A further 20 metres on there is another more prominent wall about three metres high.
Follow this wall to the north for about 50 metres or so. You should swim past a small overhang and then over four large holes. Turn around here and follow the wall back to the south. Continue on past your starting point and you will encounter another hole.
The wall turns back to the west and just before the corner there is yet another hole. The corner itself is dominated by a large overhang and another is found a little deeper below your position.
The wall continues north up a "gully" and there is another overhang below the ledge. The depth is still about 12 metres. The overhangs here are home to eastern blue devils and giant cuttlefish.
The wall then turns back to the south. Keep following the wall and there is an even bigger overhang on the next corner.
Leaving the wall from this position, swim due south and you will see a large rock which is separated from the main part of the bommie.
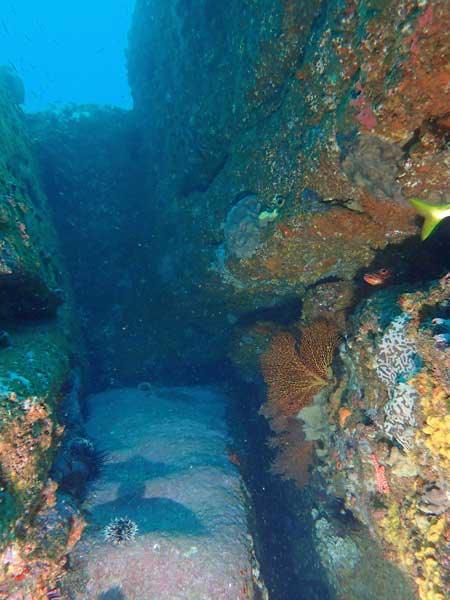
The small canyon between the rock and the wall is an excellent place to explore. The depth will have come up to 8 metres, but at the end of the canyon it rapidly drops to 12 and then 15 metres. You swim under a huge overhang. This overhang joins up under the rock and is home to some very large wobbegongs. Swim around the rock and after a few minutes you will return to the canyon. More overhangs and caves are located along this area.
Return back to the anchor by following your outward route. In early 1996 I did this dive again after not diving here for at least five years. The site still excites me and on this dive we had a seal swimming over the southern-most bommie. An excellent dive with a lot of fish.
In 2026 when I dived here again, I was a bit further south and deeper than the above dive, although the GPS was the same as the one listed above (I think I worked that out in the early 2020s). For this site, the bottom comes up from over 22 metres to 18 metres and then shallower. I anchored in 17.5 metres.
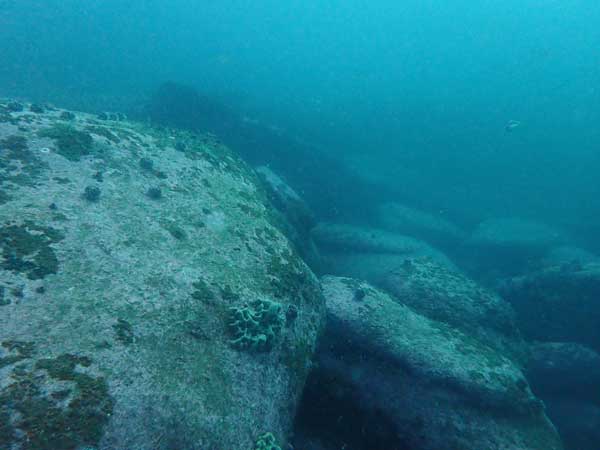 | 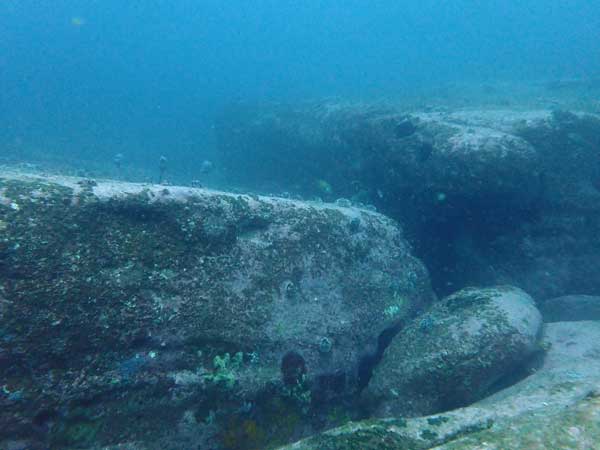 |
| The deeper section of the dive site | Another deeper area |
Once on the bottom, the reef a bit deep is large boulders running down to sand at 22 metres. There is more reef further south of the sand. From the anchor, we went east and followed the 19 to 20 metre depth. There are some walls and small overhangs. The reef has some sea tulips on it and there are a few small gorgonias here and there. You can go a fair way before it starts turning to the north. Turn around and head back.
 |  |
| A small gorgonia | Another deeper area |
Once back near the anchor, go west. There are more small walls, with some more small overhangs. The reef turns around a bit. Back at the anchor, you can go to the north up over the walls onto a flat, clear rock area at 16 metres. This is about 40 or 50 metres wide. Then it comes to a small wall which goes up to 12 metres or so. There are some more small overhangs and also a large hole in the rocky bottom. To the left the wall has some more small overhangs.
From here head back to the south and you will drop over into the area of the anchor. Spend the rest of your time around here.
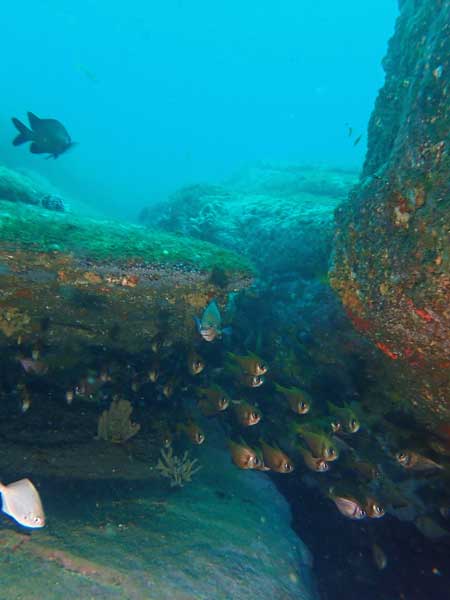
This dive has very good fishlife, including large bream, yellowtail, many different leatherjackets and wrasse as well as a good selection of nudibranches. The topography of the seabed itself is also extremely interesting.
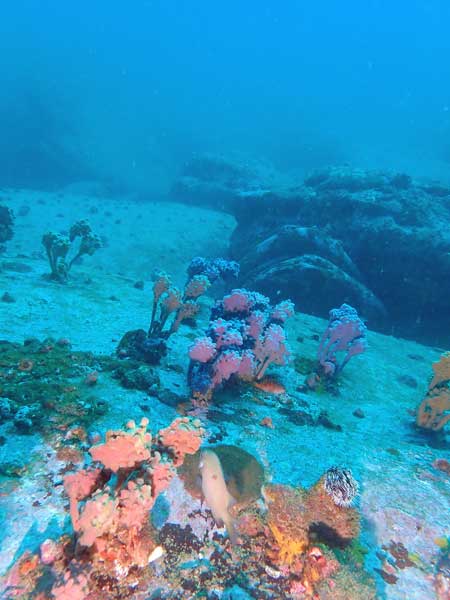 |  |
| Sea tuplips are common in spots | A small canyon |
|  v6.00.307 © 2003-2005

