|
Michael McFadyen's Scuba Diving - Sankisan Maru
It is surprising that one of the best dives in Chuuk Lagoon is only half a wreck. The Sankisan Maru was so badly damaged when it sank that only the section in front of the bridge area remains intact.
Some confusion exists as to the history of the Sankisan Maru. Hailstorm over Truk Lagoon by Klaus Lindemann claims that it was launched on 29 January 1942 at the Harima Dockyard, Japan for Kaburagi Kisen. It is listed as displacing 4776 tons and 112 metres long and 15.8 metres wide. Lindemann claims that on 7 October 1943 it was requisitioned by the Japanese Navy for cargo carrying purposes. There is no mention of the ship in any Lloyds Register.
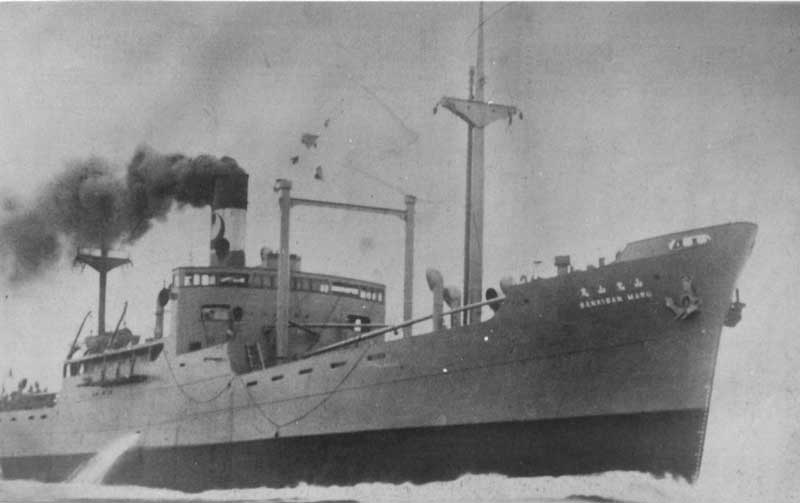 |
| The Sankisan Maru |
However, WWII Wrecks of the Kwajalein and Truk Lagoon by Dan E. Bailey states that the ship was launched as the Red Hook in 1920 at the D.D. Todd & Construction Corp. in Tacoma, Washington, USA. This book gives the ship's dimensions as 4752 tons, 380.3 feet long and 53.1 feet wide. According to this version, the ship went through the names Commercial Traveler [sic], Nelson Traveler [sic] (1936), Point Estero, Estero (1939) and finally Yamakisan Maru (internal to Japan). It is claimed that the ship was captured by the Japanese in 1942. This ship is mentioned in various Lloyds Register but I could not find the final Japanese name.
A web site (http://shipbuildinghistory.com) has a page on the Todd Pacific Shipyards, Inc., Tacoma WA shipyard (formerly Todd Dry Dock & Construction Company and Seattle-Tacoma Shipbuilding). This says that the Red Hook ended up as the Naruo Maru in 1941 and was torpedoed and lost 1944. Another web site (http://www.cimorelli.com/cgi-bin/magellanscripts/ship_dates_volume.asp?ShipName=Red+Hook+(steamer)) says it was seized by the Japanese in 1941.
I think I prefer Lindemann's version. Whatever is the case, the Sankisan Maru was used for carrying munitions, including depth charges, artillery shells, beach mines and rifle/machine gun rounds. Despite the damage to the ship, it is certainly a great dive and shows fully the horrors of war.
Again, conflicting stories about the final moments of the ship are given in the two books (even in the same book), but I prefer the version in Lindemann's book for the following reason. A photo on page 173 in Bailey's book allegedly shows the Sankisan exploding from a torpedo hit on the starboard side in front of the bridge. However, Lindemann's book says this is the Amagisan Maru and a close examination of the exploding ship and earlier photos of the Sankisan and Amagisan Maru show that the exploding vessel is really the latter (compare masts and kingposts). Also the Sankisan Maru does not appear to have any torpedo damage on the starboard side in front of the bridge.
It is possible that on 17 February 1944 in Strike 3D, four Curtiss SB2C Helldivers from USS Bunker Hill attacked the ships anchored west of Uman Island. One of these ships was the Sankisan Maru and it was reputedly hit by one 1000lb bomb forward. However, there is no obvious damage in this area. It is stated that on the second day of Operation Hailstorm, 18 February 1944 (the correct dates for the attacks are 17 and 18 February 1944, some books give the American time dates of 16 and 17 February), the Sankisan Maru was attacked in Strike 3A by five Helldivers and at 0600 it was hit by planes from the USS Bunker Hill. A hit aft of amidships was recorded, with a subsequent large fire. However, no explosion was reported.
 |  |
A drone shot of the Sankisan Maru
Photo courtesy of Kevin Green | Another drone shot, mast and kingpost are very obvious
Photo courtesy of Kevin Green |
Nowadays, the Sankisan sits on a sandy bottom of 34 metres about 500 metres off the southern end of Uman Island. The wreck is located at GPS Reading of N7º 17' 43.7" E151º 52' 08.2" using WGS84 as the datum. This will put you on the kingpost.
While the front half of the ship is very well preserved, the back half is totally destroyed, with the hull, deck, machinery and superstructure mangled beyond recognition. It is very obvious that the fire started by the single hit spread into the rear holds which held ordinances and caused a series of massive explosions, probably centred on Hold 5, which ripped the ship apart.
 |  |
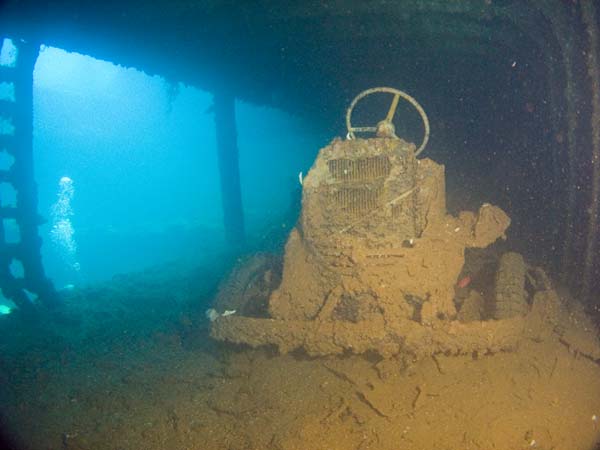
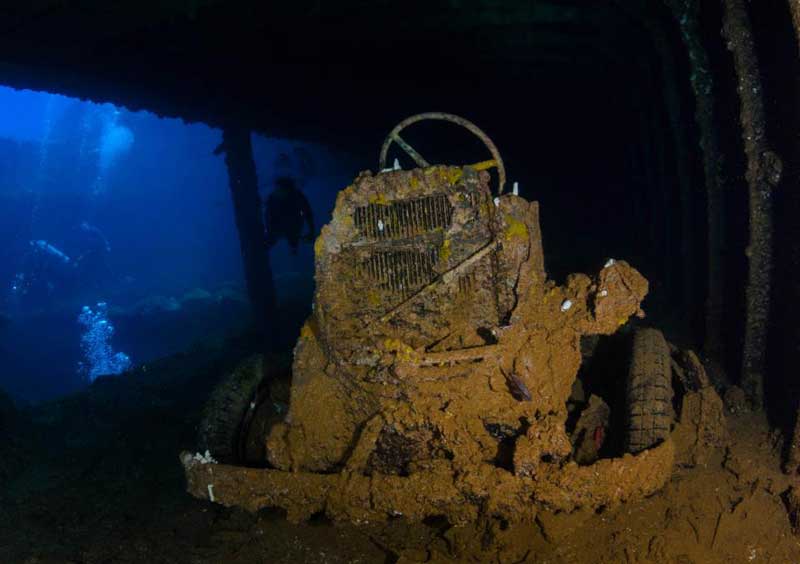
| Inside the forecastle of the Sankisan | I think this truck is on the port side near Hold 1
or perhaps between Holds 1 and 2 |
Today your dive boat anchors on the forward kingpost which is about five metres below the surface (they used to use the mast which was about a metre below the surface but it has now collapsed a bit). Start your dive by going to the bow and swimming out past it to give you a good perspective of the ship as it "steams" towards you. Examine the port anchor and then the bow gun which is quite nice.
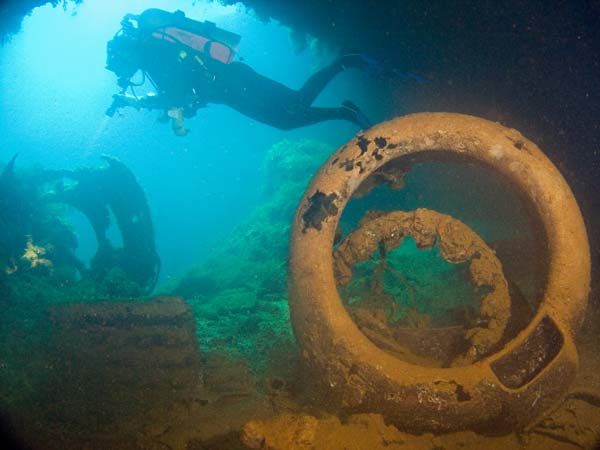
From here you can go into the forecastle under the bow. There is a hole on the port side of the bow hull where you can enter and you can exit out the door. There is a spare ventilator on the left as you enter via the hole and also lots of other equipment.
Drop down into the chain locker if you like. Exit out the door in front of Hold 1. Before entering the hold, have a look at the cargo carried on the deck near this hold. There are three trucks here, one on the port side, one on the starboard side and another forward of the hold. All that generally remains of the trucks are the chassis, axles, wheels and tyres, engine and radiator and steering wheel. The body was either timber or light metal and has disappeared long ago.
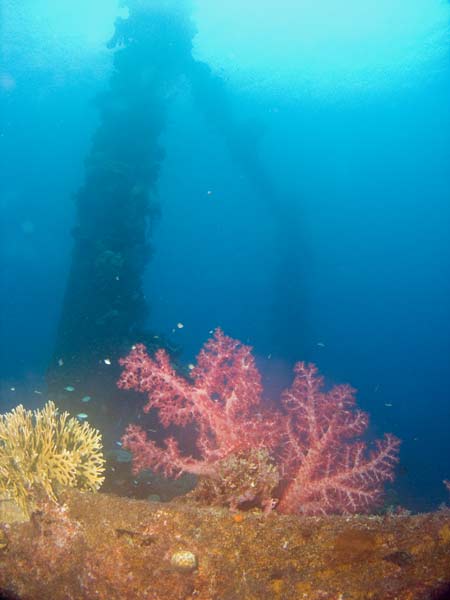 |  |
| The kingpost of the Sankisan | Inside Hold 1 |
Drop down into Hold 1. Here you will see millions of rounds (bullets). These are in wooden boxes, in clips and loose. Originally this hold also contained depth charges but they were removed in 1974 for safety reasons. You can swim through to Hold 2 on the 'tween deck.
Hold 2 contains a fabulous amount of material. There are five trucks in the hold and on the 'tween deck. Three of the trucks are on the port side 'tween deck. There is another on the starboard side I think but it is buried in what appears to be coal. As well there are at least three radial engines (probably Zero engines) and four engine cowlings. The engines are on the starboard side 'tween deck and the cowlings the same side but forward of the engines. There are also a number of aircraft undercarriages (again, Zeros), a large compressor and parts of plane fuselages.
 |  |
| Another truck on the deck | An aircraft engine cowling inside Hold 2 |
 |  |
| This truck is on the 'tween deck in Hold 2, port side | Two aircraft radial engines in Hold 2 |
It is also reported that at least 30 glider bodies are also in this hold, but I did not identify them. There are also some unidentified objects that resemble folded ponchos (but they are not). I also saw a lot of what look like cans. They may be hand grenades or perhaps cans of food (?). There are also bottles on the port rear side of the hold.
Adjacent to Hold 2 on the deck are more trucks. From memory I think there is one either side.
 |  |
Phil Rose in front of the kingpost of the Sankisan
Photo by Kelly McFadyen | One of the trucks - this is on the starboard side
Photo by Kelly McFadyen |
Hold 3 can be entered from Hold 2 or above. The only interesting thing in here is a huge pile of coal and some damage. Past here the ship is mostly gone, although there are fragments under the prolific coral growth.
Journeying further towards the rear you can find the remains of the engine room (you must look under every bit of twisted metal). The propeller shaft is also visible is spots. About 30 metres past Hold 3 the hull comes to an abrupt end on either side of the ship. Past this the ship just does not exist anymore.
It is reported that the prop and a small section of the stern remain about 100 metres to the rear of the rest of the ship. Some of my friends dived it back in the late 2000s and said that it is at a depth of about 55 metres or so.
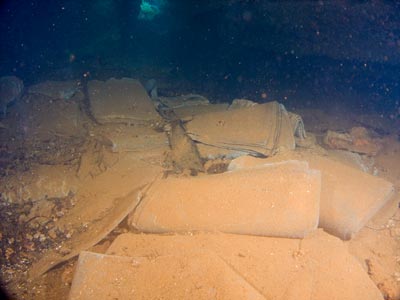 |  |
| These appear to be small tarps or similar in Hold 2 | A lifeboat davit in the wrecked area |
One of the best things about the Sankisan Maru is the coral and other marine growth on the wreck. Nearly every piece of the vessel is covered in soft and hard corals. Great photo opportunities exist on the kingpost, mast, the derricks and the anchor chains.
The depth of the wreck goes from 34 metres on the sand (not much to see there), 18 metres for the deck to 24 metres around the broken up midships. The ship extends up to almost the surface. A dive of 60 minutes is easily achieved using a computer.
In summary, the Sankisan Maru is one of the best dives in Chuuk Lagoon, with great marine life, lots of artefacts and interesting places to explore. A "must do" dive on your visit to Chuuk.
Dives:
19 November 1994
22 November 1994
10 November 1997
24 October 2011
Additional Photos
Photos by Shaun Reynolds taken March 2013.
 |
| Another photo of the truck on the 'tween deck in Hold 2, port side |
References:
Hailstorm over Truk Lagoon by Klaus Lindeman
Hailstorm - The Dive Guide by Klaus Lindemann
WII Wrecks of the Kwajalein and Truk Lagoon by Dan E. Bailey
|  v6.00.307 © 2003-2005

