"There are two dive sites at Middle Ground, both are fantastic"
San Francisco Maru
Michael McFadyen's Scuba Diving - San Francisco Maru
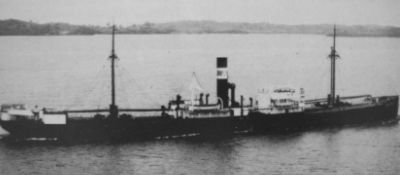
This is THE wreck of Chuuk Lagoon and perhaps THE wreck of the world. The San Francisco Maru was one of about 50 almost identical ships. She was a Taifuku Maru class cargo/passenger ship. The San Francisco Maru was built in March 1919 by Kawasaki Dockyard Co Ltd in Kobe, Japan for Kawaski Dockyard Co Ltd. Launched on 1 March 1919 and placed into service on 14 March 1919, the new ship was 5,831 tons gross, 117 metres (385.0 feet) long and 15.5 metres (51.0 feet) wide. The San Francisco Maru was powered by a single compound coal powered (two boilers) steam engine built by Kawasaki producing 440 NHP. It had a crew of 40. It is said that this ship was a predecessor to the US Liberty ships but as they were 2,000 tons larger, diesel powered and built in a different country, I find this hard to believe.
San Francisco Maru The tanks in photo below are to right of white bridge area
Another photo of the San Francisco Maru
On 30 November 1920 the San Francisco Maru arrived in Fremantle, Western Australia. This is the port for WA's capital Perth. Sometime between 1921 and 1922 the ship was sold to Kohusai Kisen Kabushiki Kaiska and in January 1923 she was converted to an oil powered steamship. Sometime in 1932 the ship again travelled to Fremantle and on 12 September 1934 she visited for at least the third time.
In about 1937 she was again sold, this time to Yamashita Kisen KK but all through this, her port of registry remained Kobe. It is alleged that when the war started the San Francisco was in semi-retirement.
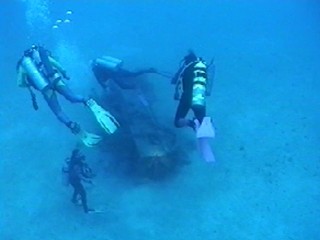
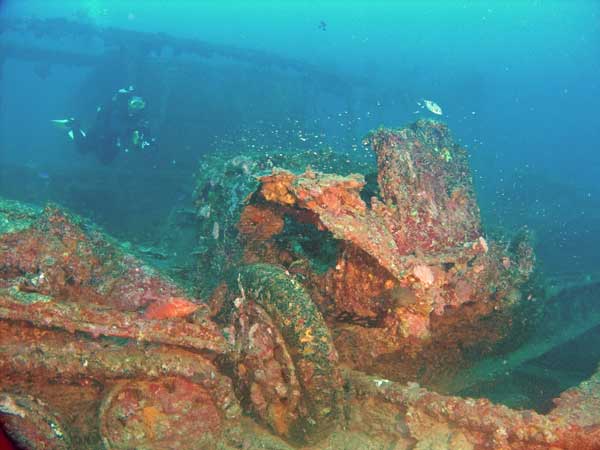
The steamroller on the sand on the port side 1997 photo from Hi8 video
Daryl Gibbs and Eddy Labour and the steamroller 1997 photo from Hi8 video
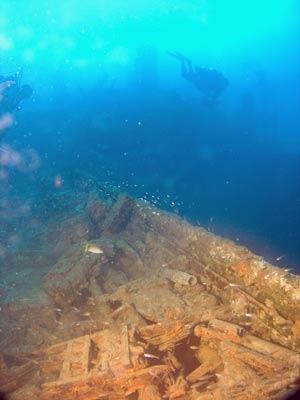
Looking back from the steamroller towards the bridge 2011 photo
Another photograph of the steamroller 2011 photo
During the war the ship was used by the Yokosuka Navy Transportation Department to ferry equipment and supplies. It arrived in Chuuk on 5 February 1944 as part of a convoy but had remained there when the convoy sailed on the 12th. On 16 and 17 February it was attacked by US Navy planes and it was sunk on the 17th by planes from the USS Essex. It was hit by six 500lb bombs and immediately caught fire and sank stern first.
The wreck was discovered in 1972 by Sam Redford. Today the San Francisco Maru sits on a sandy bottom with the bottom of the stern at 57 metres (not 70 as reported in some books). The bow end is a bit deeper, say 60 metres and the sand on the port side it is about 63 metres. The wreck is basically upright. This is not a dive for the inexperienced.
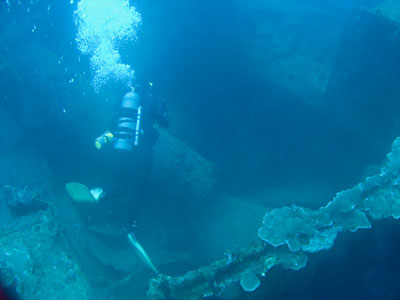
A GPS Reading of Nâ°ï¿½ 21' 50.6" E151â° 54' 36.7" using WGS84 as the datum will put you on the bow. There is a mooring off the bow and many dive boats will use this, but they also anchor on the bridge area. If you are doing the stern section of the wreck, make sure your guide anchors here. Assuming that you are on the bridge, the first thing you see when descending is either the front mast which reaches to 30 metres or you may see the rear mast. As you pass them you glimpse the outline of the ship, dropping deeper into the clear blue warm water until you see the bridge.
On your first dive here you should do the bow section and on a subsequent dive the stern section. The following is a description of the two dives.
Dive One
From the bridge go straight to the port side and head out a little. If the visibility is good enough (it usually is 40 metres or more) you should see a large steamroller lying on the sand about 30 metres or so off the wreck. If the viz is not that good, swim out level with the bridge and you should soon see the machine. If you want, drop down to it (63 metres) and you will see that it has equal size front and rear rollers (obviously powered by an internal combustion engine not a steam engine). Spend only a minute looking at it before starting to ascend towards the deck area in front of the bridge. As you come over the railing the depth is 50 metres.
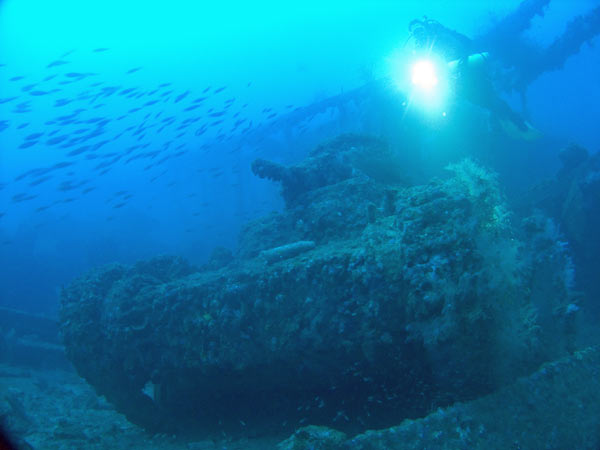
The starboard rear tank with bridge in background Taken 2005
The port tank - bridge in background Taken 2005
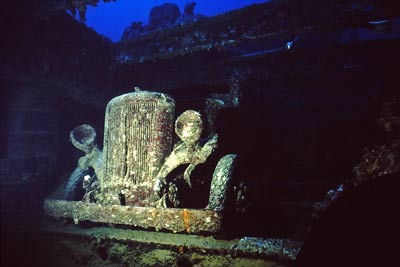
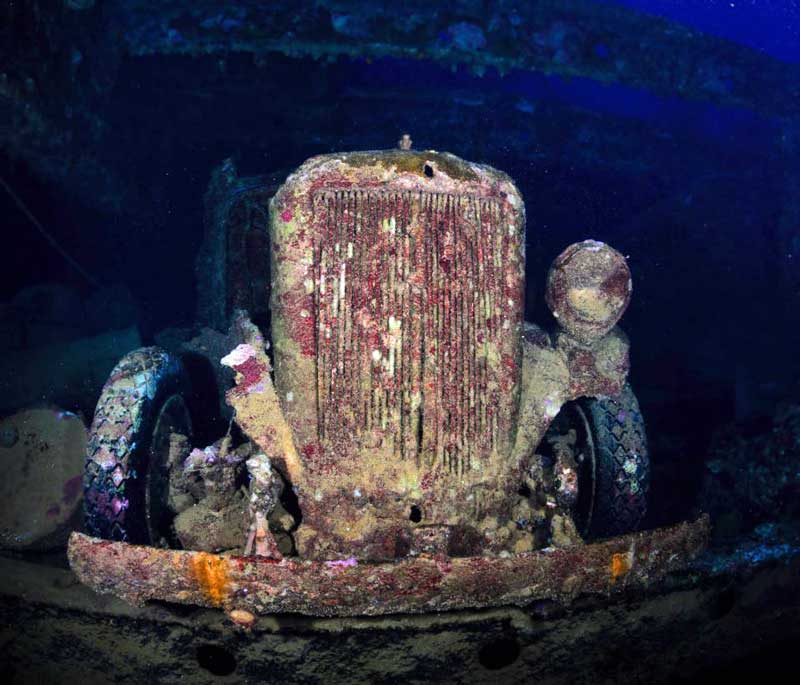
The truck on the starboard side Taken 2011
Another shot of the port tank Taken 2011
If you do not want to go to the steamroller, then head to the port side of the bridge. If you are ascending from the steamroller or after dropping from the bridge, the first thing you see is a small tank on the port side right in front of the bridge. It is facing the front of the ship but sitting a little on the deck railing. The tank is a Japanese Type-95 "Ha-Go" light tanks. These were built by Mitsubishi and carried a crew of three. It had � inch armour and weighed 7.5 tons. Armament was one 10 mm main gun and two 7 mm machine guns. It was powered by a six cylinder air cooled diesel engine which could propel the tank up to 30 mph.
There are two more tanks on the starboard side. If you do not want to check them out now, you can as you head back to the bridge to ascend. The rear one is partly over the rail as well and is also resting on top of the front right of the second tank. Both lie facing out. Inboard of the two tanks is a truck. This is a ute (pickup) and seems to have cargo in its tray. This lies over the rear of the front tank.
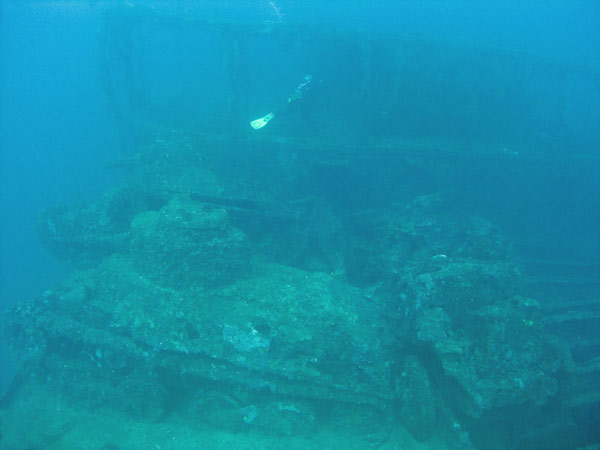
The starboard tanks looking towards the port side
The same tanks on the starboard side - bridge in background
Photos taken 1994 using Nikonos IVA and scanned May 2011
The starboard tanks looking towards the port side
Yet another photo of the starboard tanks - bridge in background. Note the truck to the right
Photos taken November 2011
It is highly likely that the steamroller that now lies on the sand was carried in front of the tank on the port side and that it fell off the deck as the ship sank, landing on the sand. It is also probable that another truck was carried inboard of these two items to balance the load on the port side. In defence of this theory, there is a truck on the sand off the port side of the rear section of the wreck, more about this later in Dive Two.
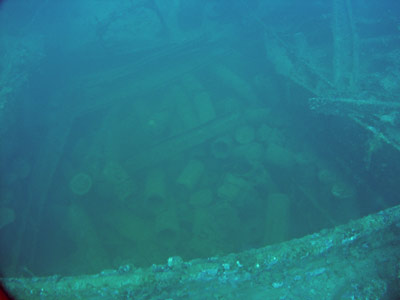
In Hold 2 (the one between the tanks) there are two small fuel tankers sitting on the 'tween deck hatch beams. The fuel tanks on this trucks stand out prominently. You can sit in the driver's seat of one and have your photograph taken. Between the trucks there are two small tractors (when I first dived this wreck I thought they looked like golf carts!!). There appears to be more tractors underneath the tankers in the lower part of the hold as well as tractors.
Behind the port tanker there are many triangular objects with a small wheel at the pointy-most end. These appear to be the rear undercarriage assemblies of aircraft, probably bombers. There are more objects in this hold but time does not permit further investigation. Even after seven dives on this wreck I have not had time to look at them in detail. The depth in the hold is about 55 metres.
The starboard petrol tanker Scanned from slide taken 1994
The starboard petrol tanker in Hold Two Taken 2005
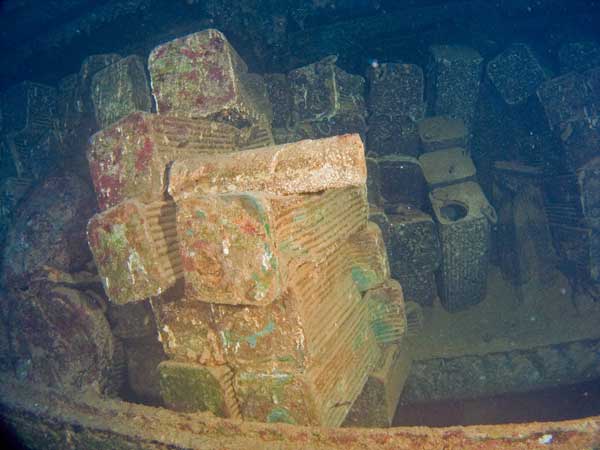
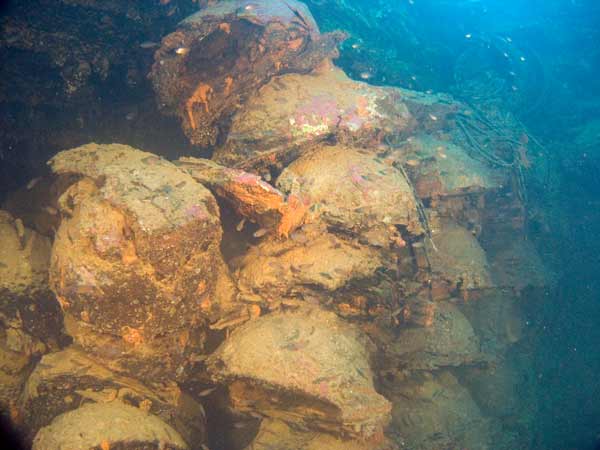
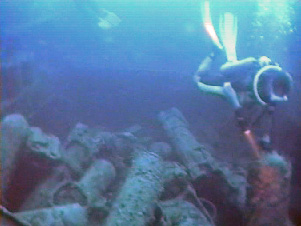
From here go towards the bow into the forward Hold 1. Hundreds of hemispherical beach mines together with the detonator horns, packed separately but nearby, are in this hold. Those of you who are old enough to have seen dive magazine stories on this wreck from the 1990s may notice that it doesn't look like the photographs in them. What has occurred is that many have been taken (stolen by dynamite fishers for the explosive). This happened in about mid-1991 and perhaps since. This hold also contains crates of empty shell casings (in pairs) and hundreds of Bakelite boxes of cordite (or a similar explosive). The cordite looks like spaghetti. There also quite a few large (200kg??) aircraft bombs packed individually in wooden crates.
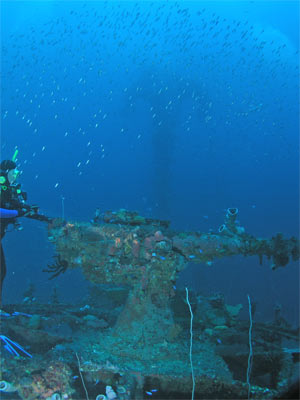
The depth in the hold is similar to Hold 2. After Hold 1, come out and go to the bow. There is a very nice bow gun worth looking at (and photographing). The chain locker at the bow can be examined but it is quite empty (bottom 52 metres and very dark).
The starboard petrol tanker in Hold Two 2011 photograph
Beach mines (bottom) and denonators (top right) in Hold One Taken 2005
Bakelite boxes of cordite in Hold 1 2011 photograph
Another photo of the beach mines in Hold 1 Taken 2011
You will normally only get about 15 or so minutes on the wreck before ascending, even with twin tanks. As you are obviously diving deep on multiple days and multiple times a day, even a bottom time of 15 minutes will require decompression of about 2 minutes at 9 metres, 6 minutes at 6 metres and 17 minutes at 3 metres.
If the visibility is very good, you can ascend the forward mast and then cross over to the dive boat anchor/mooring when you reach the top. Otherwise, swim back to the bridge and ascend as you go. If time permits, have a look through the top of the bridge.
The bow gun of the San Francisco Maru
Leo Hillier and the bow gun
Actual bottom time on this dive varies between 12 and 17 minutes depending on whether you go the steamroller, your air consumption and what decompression you want to do. For 17 minutes on only the ship you will require 1 @ 9 metres, 5 @ 6 metres and 13 @ 3 metres. The water temperature is a constant 28 to 30â°C, visibility normally 30+ metres and always a fantastic dive. A must do dive for the more experienced diver.
Dive Two
The second dive on the San Francisco Maru is the back half of the ship. This is not a dive that many people do, as most divers only visit Chuuk for a week and they normally only get taken to the front section of the wreck. On my 1997 trip we stayed in Chuuk almost three weeks, giving us the opportunity to dive many of the deeper wrecks not normally visited. On that trip, my two buddies and I decided that we would dive the rear of the wreck. It is almost as good a dive as the front part. We again did the rear section in November 2011.
The skylights above the engine room Taken 2011
Jessica McInnes and the steam engine Taken 2011
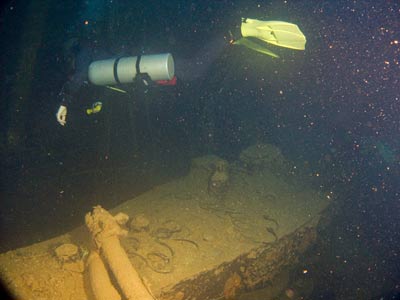
From the usual anchoring place on the bridge, drop straight to the main superstructure. There is a Hold between the bridge and the funnel. This is the coal bunker as far as I can see. You will see that the funnel has collapsed. Drop through the forward starboard skylight into the engine room. It is a very large and open engine room. The engine is a triple expansion steam engine. There is an exit out the rear into Hold 4.
Hold 4 has a hole on the 'tween deck on the port side towards the front. I did not examine this carefully, but it was caused by an explosion from inside the ship. It is a hole about one and a half metres across. This was obviously caused by one of the 500 lb bombs dropped on the ship and probably caused the San Francisco Maru to sink.
Kelly McFadyen entering Hold 3
Adam Florence and ammunition in Hold 4
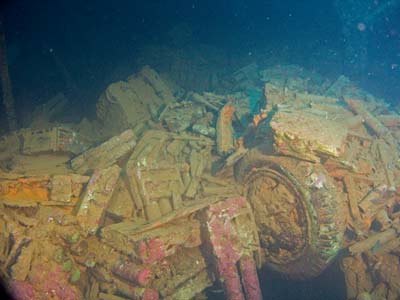
The beams on the 'tween deck used to have two trucks on them. These trucks were facing the stern and the rear axle has fallen away from the port side truck. From memory of my 2011 dive, these may now have fallen further. In the 'tween decks there are a lot of ammunition boxes containing bullets and shells. Most of the shells are packed in smaller boxes of four that contain the heads. There are three and four inch shells, beach mines (and their detonators - like Hold 1) rifle rounds. There is a lot more here as well.
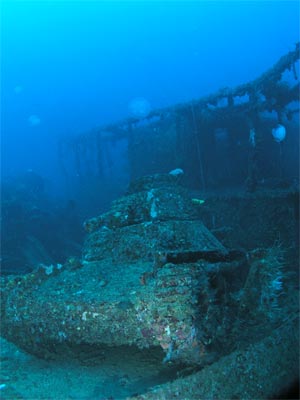
Hold 5 has dozens of torpedoes, mainly bodies and engines. I did not see any warheads. There are hundreds of 200 litre drums in this hold, mostly in the 'tween decks. These were full when the ship sank as they are not imploded. There are also some depth charges. The rear deck is about 50 metres and the bottom of the holds 55 metres. Back on the main deck and heading towards the stern you will see that there is a considerable amount of damage between hold five and the poop deck. The back of the ship is broken here.
Entering Hold 5 Photo from Hi8 video
The bomb hole in the port hull from inside Hold 4 Photo from Hi8 video
The torpedoes in hold 5 Photo from Hi8 video
The prop and rudder Photo from Hi8 video
Behind Hold 5 the poop deck has collapsed in the middle. There is no stern gun, although there is a gun platform so it looks like there might have been one mounted here at one time. The stern telegraph is not located at the very stern, but is now lying in the port doorway to the small cabin above the poop deck. Look in the poop deck and you will see the stern telegraph sitting on the floor inside the port door. If you have time and air, you can drop over the deck down to the sand where you can see the prop just showing above the sand. The depth here is about 57 metres.
There is major damage to the port side as the bomb that helped sink the ship hit off here.
The wheel of the truck in Hold 4
The ammunition adjacent to Hold 4
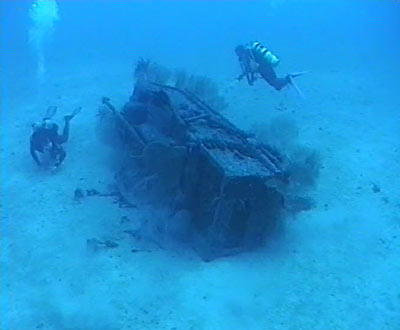
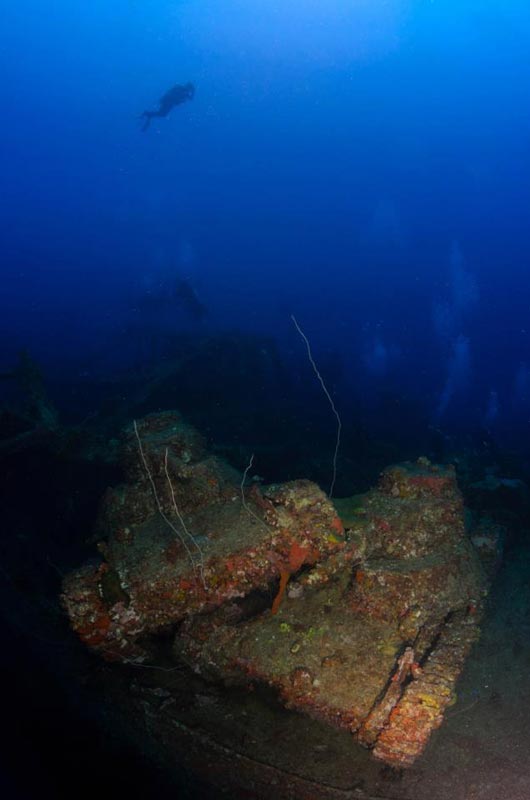
As you return to the bridge from the stern, travel along the port rail and look out to your left. If the visibility is very good, you will see a section of the derrick from the rear mast on the sand. Coming a bit forward you will see another exciting find. Adjacent to Hold 4 there is a fully intact truck on the sand about 10 metres or so from the wreck. The truck faces away from the wreck. It is likely that the truck came from the port side in front of the bridge. This is same location where the steamroller, which lies a bit further forward, came from. This makes sense as it would balance out the two tanks and one truck on the starboard side.
If you have time you could drop down and look at the truck or continue forward. On the deck adjacent to Hold 4 there is a lot of ammunition. Once you are back at the superstructure you can swim through part of this and come out near Hold 3. Then ascend to the bridge. Again, you will only get about 17 minutes or so bottom time before running into serious decompression commitments.
Looking into Hold 5
Torpedoes in Hold 5
As I indicated above, this is almost as good as the first dive on the San Francisco Maru.
Summary
As I have indicated, this is, without doubt, the best wreck dive in Chuuk Lagoon and among the top two or three dives anywhere in the world and perhaps the top wreck dive anywhere in the world. There is so much to see you need many dives to appreciate the full range of the artifacts to be seen on the wreck. The visibility here is normally excellent. On my seven dives here I have had from 30 to 50+ metres visibility. A must do dive for the very experienced diver.
The stern gun platform of the San Francisco Maru
The bomb damage on the port side forward of the stern
The truck on the sand on the port side just forward of the stern
 v6.00.307 © 2003-2005